https://www.factorydirectblinds.com/blogs/articles.atomFactory Direct Blinds - Articles2024-05-30T06:47:43-07:00Factory Direct Blindshttps://www.factorydirectblinds.com/blogs/articles/faux-blinds-guide2024-05-30T06:47:43-07:002024-05-30T06:47:43-07:00Faux Blinds GuideFactory Direct Blinds
Before purchasing faux wood blinds, you may want to consider a few factors to ensure they will satisfy your window-covering needs.
Faux wood blinds resemble that natural glow and warmth of real wood. You will find that the faux wood material is made of wood composite, vinyl or plastic polymers.
Many faux wood blind options are accessible to homeowners. If you favor the wood look over textures, fabrics, and other materials than maybe faux wood blinds are right for your windows. But what's the difference between faux wood blinds and wood blinds?
The Differences Between Faux Wood Blinds and Wood Blinds
When it boils down to wood blinds and faux wood blinds, there are several key differences between faux wood and hardwood that you should consider before making any major purchases.
Real wood blinds remain extremely popular, and for many of us, there is no substitute.
Advantages of Real Wood Blinds:
The wood stain colors showcase the wood grain texture within the blinds
You'll usually have a larger choice of colors and stains to choose from
Much lighter in weight than faux wood blinds
Durability
An increasing number of homeowners are starting to consider the real benefits of faux wood and recognizing their overall potential.
Advantages of Faux Wood Blinds
Less expensive than real wood blinds
Durability
Perfect for homes with children and pets
Moisture resistant, making them perfect for kitchens and bathrooms
Easy to clean and maintain
Some even include anti-static properties that help resist dust
Cleaning Faux Wood Blinds
Faux wood is easy to care for and will continue to look their best over time. Always remember to read over the manufacturer's directions before applying any cleaning solution. Typically, a damp cloth with mild detergent and warm water will keep the slats clean every time. Avoid using any abrasive cleaners or sponges. These may cause irreversible damage. Then you can use a vacuum's brush attachment to remove any remaining dust and loose dirt.
Faux Wood Blinds Colors And Styles
Faux wood blinds come in a different assortment of textures, and colors that will complement the appearance of your home. There are so many earthly tones and textured colors in faux wood that resemble natural wood for a rustic look. Soft, smooth, and warm colors work well with modern or traditional spaces. Lighter colors create an airy and bright atmosphere. To capture a soothing coastal ambiance, try soft greens, tans, and blues with pale whites or yellows.
From faux wood blind options to other window treatments, we provide helpful tips to help you find the perfect window treatment! See our selection of faux wood blinds and other trendy window treatment options at Factory Direct Blinds today!]]>
https://www.factorydirectblinds.com/blogs/articles/perfect-blinds-for-a-kitchen-window2024-05-30T06:47:43-07:002024-05-30T06:47:43-07:00Perfect Blinds for a Kitchen WindowFactory Direct Blinds
Roman Shades are a popular window treatment for a kitchen. They are gorgeous if you would like to add in a pop of color or pattern without over accessorizing. Roman Shades can be customized with tons of different lift options, lining options, and fold styles. You can customize them further with over 100 different print & color options.
Roller Shades are an ideal window covering for a kitchen since they are easier to clean & can be great for privacy. Vinyl Roller Shades are very popular since the window covering itself can easily be cleaned or wiped off. These Roller Shades can be made with either a continuos cord-loop or can be upgraded to cordless. If privacy is not an issue another "Roller Shade" option would be to choose a Solar screen. A Solar Screen will block out all harmful UV rays but will still allow a limited amount of light in as well as letting you see out.
Faux Wood Blinds are our go-to window covering. Since Faux Woods are made of a synthetic materiel they are easy to clean and can work out well in a kitchen, they can be made with a privacy option which means they can be made without holes through the slat. Since they don't have holes this makes cleaning the blinds much easier since you can simply slip the slats out of the cords, wash them, then slide them back into the cords. Not only does this made it much easier to clean, it also gives you added privacy.
]]>
https://www.factorydirectblinds.com/blogs/articles/getting-to-know-roller-shades-pt22024-05-30T06:47:43-07:002024-05-30T06:47:43-07:00Getting to know Roller Shades PT2Factory Direct Blinds
After reading our first blog about Standard and Reverse Roller Shades we hope its easier to take the next step to getting the perfect Shade into your cart. Lets hop into some other options you have for our Roller Shades.
Why Choose Cordless?
Cordless window coverings have become increasingly popular. They are highly recommended for homes with small pets & children. Not only do they eliminate the hanging cord on the side of the window covering but it also gives the roller shade a cleaner, sleeker look. Another great reason to choose to go cordless is its a FREE upgrade! What more could you ask for!
The next upgrade option you have is to get a cassette valance. Unfortunately our cassette valances do not come as a free upgrade like our cordless does but I promise it is worth it. Cassette Valances will cover the top of the Roller Shade hiding the roll, giving the shade a cleaner look. All Cassette Valances come color coordinated with the same type of material inserted into the valance.
Roller shades are definitely the up and coming window covering option for homes. They are extremely versatile, come in all sorts of colors and material. Take a peep at some inspiration and give us a call if you need any help!
]]>
https://www.factorydirectblinds.com/blogs/articles/getting-to-know-roller-shades2024-05-30T06:47:43-07:002024-05-30T06:47:43-07:00Getting to know Roller ShadesFactory Direct BlindsStandard or Reverse??
Roller shades are the up and coming in the world of Window Coverings, they are easy to operate, look sleek and come with tons of upgrade options, but do you ever come across the wording Standardor Reverseroll? I'm sure you ponder it in your mind before committing to a certain one but lets dive deeper into the differences.
A Standard Roll is the most common option when purchasing a Roller Shade. This is when the Roller Shade rolls closest to the glass and allows the least amount of light in. A downside of a standard roll is you are able to see more of the hardware and not too many people like the look of this. If you are one of those people, we would definitely recommend upgrading to a Valance. Valances will hide all of the hardware and will definitely make your shade look more sleek.
A Reverse Roll is when the fabric comes over the top of the Roller Shade in a "waterfall" style. This hides more of the tube so it gives the shade more of a finished look without the need for a Valance. Reverse Rolls are great for clearing the handles on doors, or cranks on older windows. The reverse roll pushes the fabric out more than the standard roll does, which is great when you have minimal window depth.
Deciding which style is always easier when you understand the differences. So which do you prefer? Check back soon and take a look at our valances, and different pull types you are able to get on Roller Shades!
]]>
https://www.factorydirectblinds.com/blogs/articles/blinds-for-bay-windows2024-05-30T06:47:43-07:002024-05-30T06:47:43-07:00Blinds for Bay WindowsFactory Direct Blinds
Having trouble finding Window Blinds for a Bay Window? Here are some great options to choose from that can make the choice a bit easier.
Roman Shades are an elegant yet very functional window covering. You have multiple fold options as well as as lift options. With over 100+ color & pattern options to choose from Roman Shades can go in any room in your home.
Pleated Shades
Pleated shades go unnoticed but can look great on a bay window. Their sleek and slim headrail design is ideal for windows that don't have a lot of depth. Like Cellular Shades their unique pleats can add more depth and texture to a room. Pleated shades can be light filtering adding the perfect amount of natural light into a room.
Woven Wood Shades
Woven Wood Shades are another great option for bay windows. Woven Bamboo Shades offer a unique window covering solution that will bring natural style and beauty to any room. Woven Wood Shades gently filter light while also providing high levels of privacy wherever they are installed.
These are just 3 of the endless options you have for window coverings. Bay Windows can be tricky but the good thing is we are only a phone call away to help you out.
]]>
https://www.factorydirectblinds.com/blogs/articles/creative-ways-to-utilize-bamboo-shades2024-05-30T06:47:43-07:002024-05-30T06:47:43-07:00Creative Ways to Utilize Bamboo ShadesFactory Direct Blinds
Not Just Twigs and Strings!
Finding the perfect window coverings for your home is one tough decision especially with so many options, from draperies to Wood Blinds to Faux Wood Blinds and more. But have you heard of Woven Wood Shades? They are gorgeous window covering that are very easy to style in an part of your home. They are made from varying colors of grasses, reeds and bamboo.
In your Living Room Woven Wood Shadeswill let in a perfect amount of natural light. These window treatments can bring a touch of color and texture to your room. Pairing these shades with draperies or curtains add more drama and appeal. Keep in mind if you are putting them in a living room with a TV a blackout liner may be something to consider.
In your Bedroom Woven Wood Shadesadd a gorgeous touch of contrast. If you opt for a lined version of this shade it'll be perfect for those days when you want to sleep in. These blinds provide a "natural relaxed retreat" setting. One of the primary advantages of these shades is the ability to switch between a great view, and complete privacy when needed.
In your Kitchen Woven Wood Shadesnever fail to shine. We spend most of our time in the kitchen while we are awake throughout the day. When you think of blinds in your kitchen you want something that is easy to clean and simple to operate, Woven Wood Shades only need occasional dusting and they pretty much take care of themselves.
In your Bathroom Woven Wood Shadescreate a "spa-like ambiance" Woven Woods are a good option that let in light but still make it difficult for anyone to see in. They add a layer of textural and visual interest. The different color and binding options let you really change the style of your bathroom, without paint or other decor.
In your Dining Room Bamboo Shadesare perfect because they are extremely easy to pair with any wood furniture. They let in just the right amount of light that gives it the perfect glow. They can give the room a much warmer feeling and add so much more texture and interest.
There is so much more to Woven Wood Shades then what meets the eye, They are gorgeous eco-friendly option when choosing window coverings. They come in so many different colors, patterns, and style options. They can add life to a room and really give it more appeal. Contact Us if you need any help on choosing just the right ones that are perfect for you!
]]>
https://www.factorydirectblinds.com/blogs/articles/popular-colors2024-05-30T06:47:43-07:002024-05-30T06:47:43-07:00Popular ColorsFactory Direct BlindsFall in love with the latest color trends!
1. Plum: plum can be very warm and vibrant depending on how you use it and what type of shade you go for (bright or dark). It is a very rich color that adds a lot of depth to walls, It can go great paired with marigold yellow, lavender, or beige. Plum works best on walls in a small intimate area like a library or bedroom. Don't let it explode on your walls, having one wall painted with plum is a perfect way to add a little color
2. Weathered Brass:weathered brass can be more of a classic accent color. Brass is very durable and it very popularly used in kitchens or bathrooms, seeing as it will not rust. Brass is known to be Timeless, warm and inviting.
3. Red: Red is a colors full of passion and drama. Whether its used with a ton of accessories or used on just one wall it can make a room come to life. Red is widely used in kitchens as it is known to increase appetite. Using red prints on shades is also an alternative if painting a wall too risky.
4. Early Grey: The cool grey color can serve as a beautiful backdrop for any style furniture, draperies, or accessories. It can be paired with white for a more timeless, sophisticated look. Different styled draperies or throw pillows with several prints and colors can help tie a room together.
5. Indigo: The cool color of indigo has many different "moods" it can range from a lighter blue to a very deep vibrant blue. This color blue can create an atmosphere of meditation and work. It is known to help lower blood pressure and heart rate. It can be used beautifully in both kitchens and living rooms.
6.Copper: Kitchens and Bathrooms are the most common areas copper is used, just as weathered brass is. The color copper is more of a brown rustic color. This gorgeous color doesn't boast or overwhelm, it is very subtle. It can be used anywhere in your home from knobs on a kitchen sink to plant vases in your living room.
7. Orchid: Pairing this rich color with colors like grey, whites and tans is a great way to let it take center stage. It can be used perfectly as an accent wall in a living room or bedroom. If your looking for more of a dramatic look pairing it with black adds the perfect punch. If you get tired of the same colors too quickly then try using accent flowers or a rug instead.
8. Lime Green: The color green represents growth and renewal. It comes in so many shades you have the option to create many different moods. The soothing, and calm feeling makes it ideal for any room in a home. If you don't want the overpowering of lime green in your home try using accent chairs or vases that have hints of it. Mix green with bamboo woven wood blinds to give the room an organic, natural feel.
9. Mint: Mint is a very versatile hue when used in home decor. Mixing it with darker shades like dark browns can help bring the perfect contrast to a room. If you would like to use small pieces with mint they are great for creating a focal point, it draws a great amount of attention. Mint is a very elegant way to add a splash of color to a dull space since it isn't very bold.
10. Daffodil Yellow: Yellow is perfect for a mood boost, and giving your home energy. This yellow works best in rooms where you want to stimulate conversations. Kitchens and Living rooms are both areas that can benefit from this pop of color. Natural Wood tones can help tone down this color for more of a relaxed look.
Now that we've told you some of our favorite picks, its up to you to make them come alive in your home. Take a risk and go bold! You'll never know how much you LOVE it till you try!
]]>
https://www.factorydirectblinds.com/blogs/articles/things-to-consider-before-you-choose-new-blinds2024-05-30T06:47:43-07:002024-05-30T06:47:43-07:00Things to Consider Before You Choose New BlindsFactory Direct Blinds
When you are purchasing anything new for your house, do you go for something that looks best in your home or something that WORKS best in your home? Chances are you have a look you want to achieve before you think about functionality. When you are choosing window treatments, you must consider a couple of factors that could determine what treatment suits a window best! Luckily, Factory Direct Blinds window treatments are both functional and pleasing to the eye! Here are some factors you should consider before committing to your window treatment!
You have to stop and think.. How much light does this rooms get? If there is a window facing the East, there is a room hotter than the rest of the house! Believe me, if that room is your bedroom then you should probably look into Blackout Shades! Blackout Shades will quickly become your saving grace during the summer season and when you want an extra hour of sleep!
Room Humidity
Although Roman Shades can be a tempting treatment for most windows, fabric and moisture do not mix well! Humidity and fabric shades can lead to a musty smell so bathrooms and kitchens are not the ideal environment. Moisture from the shower can lead to a musty smell and splashes from the sink can lead to a tougher stain. The better choice for these rooms would be Faux Wood Blinds which are perfectly suited for high humidity environments!
Window Size
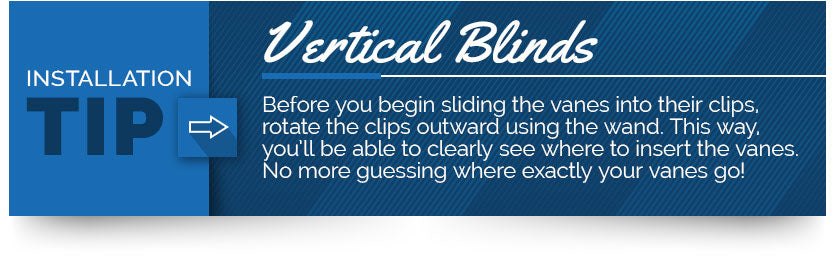
For larger windows, consider lighter weight options! The world of Vertical Blinds is larger than one may think! Fabric Vertical Blinds are modern and give you the option of solar screen or fabric! PVC Vertical Blinds don't always stick to the straight and narrow either, S-Curved Verticals block out as much sun as possible and look amazing.
Before you make your choice, consider the factors. How much sun do you want entering? How much water gets exposed to the room? Will this large window need a large treatment? Every window treatment from Factory Direct Blinds looks amazing and they have every treatment for every need! You can give them a call at 1(800)355-2546
]]>
https://www.factorydirectblinds.com/blogs/articles/budget-friendly-blinds2024-05-30T06:47:43-07:002024-05-30T06:47:43-07:00Budget Friendly BlindsBrittany Gordon
With all the fun summer activities that your kids are begging you to do this summer, replacing or adding window coverings may not be in your budget. Or you may think they aren't. Factory Direct Blinds offers everyday low prices, with no coupon code needed. New blinds may be more affordable than you think. With the summer heat, having your windows covered is a must. Here are a few examples of some of our most affordable window coverings.
You may think vertical blinds are a thing of the past or can only be used on a patio door. Many tend to overlook these simple, yet affordable option. Vertical blinds come in a wide range of color and texture options. Our classic smooth verticals are the perfect solution for any home on a budget. They come in simple colors that are sure to blend with anyone's home decor. Replacement slats are also available at the time of purchase, which is great for homes with children running around. Verticals are also extremely simple to install, they are lightweight and can be pulled to the side allowing you to enjoy your view.
Mini Blinds can be a wonderful compliment to any room but work excellent in a child's room where a colored blind would add more to the decor. They are inexpensive enough where they can be changed or swapped out for a different color. Make sure to secure the cords on all window coverings to make sure they stay out of a child's reach. Mini blinds are also great when you need quick window coverings. You won't feel guilty later on if you chose to upgrade!
Faux wood blinds really can look great in any room. They are perfect for bathrooms or places with high humidity. They are easy to clean and come in a wide selection of colors. Faux Wood blinds are also affordable. They can fit well in even a formal living room or can be great for bedrooms. They are a tad more durable than a mini blind and can be a great upgrade option.
Don't be afraid of window coverings and their prices. With our everyday low prices we are sure you will be able to get every window in your home covered and not break the bank. Our friendly staff is here to answer any questions or concerns you may have about your new coverings. We can walk you through our easy and simple ordering process. Feel free to live chat, email or call us. Also be sure to check out our reviews!]]>
https://www.factorydirectblinds.com/blogs/articles/best-blinds-for-babies2024-05-30T06:47:43-07:002024-05-30T06:47:43-07:00Best Blinds For Babies!Brittany Gordon
We are welcoming the newest member of the Factory Direct Blinds' family this coming August and we could not be more excited! With the news of a new baby, there are nine months of planning. One of the most important things to plan for is the nursery. This will most likely be the place where your baby will be spending a lot of time during its first couple of months. Hopefully there will be lots of sleeping taking place, and to help with that is the perfect window covering. Woven wood blinds can be seen all over Pinterest. Many are layering them with a draperies, but we like them best with a blackout liner. Getting your baby's room nice and dark will help nap time to go smoothly.
Faux wood blinds are also a wonderful option when choosing a window covering for your nursery. Be sure to choose the privacy or routless option for optimal light control.
Here is another example of woven wood blinds but without a blackout liner. I love how it just filters the incoming light.
Basswood blinds are also a contender for children's room because they are durable and lighter then a faux wood blind.
Roman shades come in a wide range of colors that can really help tie a room together. They also are available with a blackout liner.
Cellular shades are our favorite pick for baby's rooms. The color selection that we offer is huge so we are sure you can find the perfect one. They are available in cordless - making them very child safe, which is the most important thing when picking out window coverings. For more tips on child safe blinds read our child safe blind blog.]]>
https://www.factorydirectblinds.com/blogs/articles/how-to-install-curtains-over-blinds-step-by-step2024-05-30T06:47:42-07:002024-05-30T06:47:42-07:00How to Install Curtains over Blinds: Step-by-StepNoah Edis
For some rooms, curtains alone may not give you enough light control or privacy. However, opting for only blinds may leave the room feeling cold and lacking depth. Add a sense of depth and elegance to your home decor and your space by installing curtains over your blinds.
Design Considerations
When combining window coverings, you can create a complete look that makes a room feel warm and cozy. You can also add curtains that lighten and brighten a room. Understanding how the two window treatments play together will help you create a space you enjoy.
Curtains give you the ability to play with colour in your room. Consider the colour of your blinds and how curtains can accentuate or minimize the emotions that colour evokes. The colour of your curtains can also shift the focus of the room toward or away from the window.
The ability to play with colour through your window curtains is not a free pass to go overboard with patterns. Keep things looking coherent and well-designed by matching solids with one print per room. For windows withwarm-toned faux wood blinds, consider pairing with a solid colour curtain to prevent the design from becoming too busy.
The mounting location of your window shades matters when considering installing curtains over them. Curtains look best when overtopping inside mounted blinds. The curtains will cover the mounting hardware and highlight the window height and shape. Adding curtains over outside mounted blinds adds bulk to the top of the window. The mounting hardware for the blinds may make it difficult for the curtains to lay smoothly or move without issues.
The process for how to install curtains over blinds is simple. Depending on your mounting type, you may not even need to drill holes. Here are the steps to follow when installing curtains over blinds.
Choose Your Mount
You need mounts for your curtain rod to rest in. When you are installing curtains over blinds, you have several options for mounting your curtain rod.
You can use the traditional curtain rod with external mounting hardware to drill into the wall after careful measurement. This works well withmodern cordless roman shades since their internal hardware is completely hidden behind the fabric.
If you have horizontal aluminum blinds or vertical slat blinds, you can mount the curtain rod onto your blinds with the help of a curtain rod bracket attachment. You can install this bracket without drilling any additional holes into your walls. The bracket secures to the headrail of your blinds and holds the curtain rod out away from the window.
Install Your Mount
Curtains look best when installed 8 to 12 inches wider than your window and at least 4 inches above the window frame. Measure the locations for your curtain rod brackets using these guidelines. Mark the location of your brackets with a pencil. If you have one available, use a laser level to ensure your mounts keep your curtain rod level. Then drill holes for the bracket screws using a drill. If you are mounting your curtain rod in drywall, you may need to insert anchors before attaching your curtain brackets with screws.
If you are mounting your curtain rod onto your blind’s headrail, you won’t need any power tools for the job. Simply slide the bracket onto the headrail and adjust the tightening screw, as necessary, to ensure a secure fit. For the best support of your curtain rod, place the attachment within an inch of the ends of your blinds.
Hang Your Curtains
Once your hardware is installed, it’s time to hang your curtains. The amount of curtain you need depends on the size of the window you have. It’s not enough to have curtains the width of your curtain rod. You want your curtains to feel full, block light and provide privacy. Ideally, your curtains will be twice the width of your window.
Avoid hanging curtains that are too short. Curtains that extend to the floor add height to a room and make your window feel longer. It’s acceptable for your curtains to hang on the floor, but if you want to keep your curtains from dragging and getting dirty, choose a length that ends about an inch above the ground.
Mount a Tieback
While not necessary for the setup, a tieback is an excellent addition to your window treatment. It provides function while adding style. You shouldmount tiebacks three inches from the edge of the window and about a third of the way up from the bottom.
There are several instances where you won’t be able to use nails or drills to hang your curtains. Maybe you’re a renter and not allowed to put any holes in the walls; perhaps you live in an old home with plaster walls that can’t handle nails or screws. In these cases, there are still plenty of DIY ways to hang curtains without nails or drilling!
Coat Hooks
One popular way to hang curtains without nails is by using coat hooks. You can find these at most hardware stores, and they come in a variety of sizes and styles. Smaller coat hooks can hold up to 10 pounds, while larger ones can hold up to 20 pounds (though this varies from brand to brand).
To use coat hooks, simply screw them into the wall or window frame at the desired distances apart. Then, loop your curtain through the hook and adjust to create the look you want. This is a great option if you’re looking for a temporary solution, as they’re easy to remove without damaging your walls or window frames.
Command Hooks
The command hook is a completely groundbreaking way to hang things without nails! These little guys come in different sizes and colours, and can hold pictures, paintings, curtains, and more. They work by sticking to your wall or window frame with an adhesive strip that won’t damage your paint or wallpaper.
To use command hooks for curtains, start by measuring the width of your window. Then, adjust your curtain rod to be about 2–3 inches wider than the window on each side (this will ensure full coverage when closed). Once you have your desired measurements, simply adhere the command hook to the wall or frame at either end of the window. Gently place your curtain rod over the hooks and adjust to create the look you want.
Suspended Rods
Suspended rods are hung from the ceiling instead of the wall or frame, which gives them added stability. These rods usually require you to find two studs in the ceiling and screw some eye hooks in; you can avoid this, however, by simply using hanging command hooks instead.
Tension Rods
Tension rods push against your walls or window frames to create tension and stay in place. They allow you to hold up curtains without nails, screws, or adhesive strips.
To use a tension rod, loop your curtain onto the rod. Then simply extend the rod until it is pushing firmly against the inside of your window frame — or alternatively, against your walls on either side of the window.
Why Should You Hang Curtains Over Blinds?
You may be wondering — if there’s already a perfectly good set of blinds installed, why would you want to go to the extra effort of hanging curtains over them? Well, there are actually a few reasons. Let’s take a look.
Controls Temperature
In the winter, heat from the sun coming in through your windows can help warm up your home. But in the summer, that same sunlight can make things uncomfortably hot. Hanging curtains over blinds gives you an extra layer to block out some of that unwanted heat.
Light Control
Do you like to sleep in on the weekends? Or maybe you work from home and need to focus during the day. Either way, having complete control over the amount of light coming into your room can be very helpful. With curtains over blinds, you can adjust both to get just the right level of light (or darkness) for your needs.
Enhanced Privacy
Closed blinds are definitely more private than open ones, but they can still allow people to see inside if the light is just right. Curtains give you an extra layer of protection against nosy neighbours or passersby.
Different Ideas for Window Treatments With Curtains
So, you’re interested in installing curtains over blinds. This is a great way to change up your window treatments and add a bit of style to your home. But what combination should you use? What works best?
Window shutters with floral curtains
Shutters and florals are two aesthetics from the traditional design playbook that always work well together. This look can be created by installing plantation shutters on the inside of your window frame and then hanging curtains over them.
If you want to add a touch of drama, go for dark-coloured shutters with light-coloured floral curtains. Or, if you want to keep things light and airy, opt for white shutters with pastel-hued curtains.
Aluminum blinds with light-filtering curtains
For a modern take on this window treatment idea, pair aluminum blinds with light-filtering curtains. This look works best in rooms with plenty of natural light, as the aluminum blinds will reflect some of the sunlight and help brighten up the space.
The key to making this combination work is to choose curtains that are similar in colour to the blinds. That way, the two elements will blend together seamlessly.
Single-cell honeycomb shades with blackout curtains
This combination is perfect for cool bedrooms or home offices, as the honeycomb shades will help keep the space insulated while the blackout curtains block out the evening sunlight.
Again, it’s important to choose curtains that are similar in colour to the shades for a cohesive look. And, if you want to add a bit of pattern or texture to the space, opt for curtains with a subtle print.
Need Some Inspiration?
The options are endless for pairinghigh-quality blinds with curtains. Check out the ideas and resources available on Factory Direct Blinds. We have a wide selection of quality blinds at factory direct prices. You’re sure to find the perfect fit for your windows.
FAQs About Installing Curtains Over Blinds
Is it OK to put curtains over blinds?
Yes, it is certainly OK to put curtains over blinds. It can actually be a great way to add another layer of style and interest to your windows. If you want a no-drill solution, you can get hold of some great adhesive hooks that will do the trick just as well.
Can I hang curtains over vertical blinds?
There is no rule that says you can’t hang curtains over vertical blinds. However, keep in mind that vertical blinds — particularly panel-style blinds — might interfere with how your curtains hang. Roller shades are a great vertical option since they sit flush with the window.
How do you hang curtains over horizontal blinds?
The best way to hang curtains over horizontal blinds is to use a tension rod. This will allow you to adjust the height of your curtains so that they sit just above the blinds. You can also use command strips or adhesive hooks if you don’t want to put any holes in your walls.
What are the benefits of putting curtains over blinds?
There are a few benefits to putting curtains over blinds. First, it can add another layer of style and interest to your windows. It can also help to block out light — particularly if you choose blackout curtains. For cool areas, it can provide some extra insulation during the colder months.
How long should the curtains be?
Since you will be hanging the curtain rod above the window frame rather than inside mount, you should add extra length to your curtains. Either have them sitting over the bottom of the window frame, or bring them all the way to the floor for a more luxurious look.
]]>
https://www.factorydirectblinds.com/blogs/articles/the-installation-guide-how-to-install-cordless-blinds-12024-05-30T06:47:42-07:002024-05-30T06:47:42-07:00The Installation Guide: How to Install Cordless BlindsNoah Edis
You’ve just set up your brand-new home office, and you want it to look perfect. But there’s one problem: the cords from your blinds are dangling down, getting in the way and making the space look cluttered. Not to worry — cordless blinds are an excellent solution that will make your home office look sleek and professional.
Cordless blinds offer many advantages over traditional window treatments. They’re safe, easy to use, and visually appealing — plus, they give you more options in terms of price, material, and colour.
In this guide, we’ll explore theadvantages of cordless blinds and break down the different types available. We’ll also walk you through how to install them step by step so you can get started enjoying your new window treatments right away.
How to Install Cordless Blinds
To begin installing your new blinds, you will need:
Pencil
Tape measure
Leveller
Power drill OR screwdriver, hammer, and nail
Blinds and mounting hardware that came with it
Stepladder
Drywall anchors (necessary if you are not drilling into a stud)
Lay out your blinds and hardware to ensure that you have all the pieces necessary to hang it up. Good to go? Let’s get into the installation process with a step-by-step breakdown.
Step 1: Measure
Take measurements to determine precisely where you will place the screws.
For outside mount cordless shades, position the headrail on the trim or wall above the window. Use a leveller to ensure it is completely straight, then lightly mark the edges of the headrail with a pencil.
Inside mounting cordless shades should have the headrail positioned inside of the window frame. Make sure there is at least ¼ inch of clearance from the window to avoid hitting it when fully extended. Use a leveller to ensure the front of the blinds is straight, then lightly mark the edges with a pencil.
Line up the brackets with the pencil marks you made in the previous set, and mark the screw holes for the brackets using the pencil. Do this for the brackets on each end of the headrail and the center bracket if your blinds are wide enough to require one. Contrary to the name, center brackets must be placed slightly to one side to avoid interfering with the blind mechanisms — so keep that in mind.
Step 2: Drill holes
Using a 3/32” drill bit, create pilot holes for the screws. If you plan to use wall anchors, then use a ¼” drill bit instead. If you don’t have a power drill, create pilot holes manually by tapping a nail partway into the wall with a hammer and then pulling it out; just make sure to choose a nail that has a diameter similar to one of the aforementioned drill bits.
Step 3: Attach mounting brackets
After creating your pilot holes, line up the first bracket with them. Next, using your power drill or screwdriver, attach the bracket to the wall using screws. Repeat this process for the bracket on the other side and for any center brackets that may be necessary. Finally, test that all of the brackets are securely fastened to the wall and that everything lines up correctly.
Step 4: Insert the headrail
Next, it’s time to insert the headrail into the brackets. The instructions vary slightly depending on which type of roller shade you have chosen. If your blinds came with a valance, you might want to attach the valance clips before installing the headrail; this is to ensure they are in correct positions and won’t interfere with the operation of the blinds.
Wood and faux wood blinds: Slide the headrail into the brackets. Fold down the front tabs until they click into place securely.
Mini blinds: Lift the headrail into position so the front edge of each bracket is under the inner front edge of the headrail. Push the headrail upward until the flexible tab at the bottom of each bracket snaps onto the back of the headrail.
Woven wooden shades: Lift the headrail and place the pin on each end of the blinds into the holes in the brackets. Attach a washer and a wingnut to each post and tighten them until secure.
Zebra shades: Slide the inner rear of the headrail onto the metal tabs at the back of each bracket. Push up so that the brackets snap onto the headrail. Pull the plastic tab on the front of each bracket outward toward the front of the shade to lock the brackets into place. For inside shade mounts, use pliers to accomplish this if you cannot reach the tabs.
Roman and roller shades: Put the spring-loaded pin into the round hole of the bracket and push the spring-loaded tip into the bracket. On the opposite side, insert the hook arms into the bracket’s two hook arm receiver holes. Once the two hook arms are inserted, gently pull down on the headrail until the two hook arms have locked securely to the bracket.
Cellular shades: Insert the front ridge of the bracket into the groove on the front of the headrail. You will have to hold the headrail at an angle initially. Tilt the shade back toward the window glass until it locks into place.
Pleated fabric shades: Lift the head rail into position so that the inner front edge of the headrail slides into the slot at the front of each bracket. Push the headrail upward until the flexible tab at the bottom of each bracket snaps onto the back of the headrail.
Always check that the brackets are securely fastened before attempting to test the blind. To operate cordless blinds, gently grasp the bottom rail and raise and lower it to your desired height. When you have adjusted your blinds to your preferences, simply release the bottom rail and they will stay in place.
What are the Advantages of Cordless Blinds?
There are plenty of benefits to cordless blinds. Think about safety; without cords, there’s nostrangulation or choking hazard for children and pets. By eliminating cords, you make your home safer for everyone.
Cordless blinds also look neater and are easier to operate. Rather than yanking on cords, you can raise and lower the blinds using the bar at the bottom. With all these advantages, it’s no wonder that more homeowners are choosing cordless blinds over corded models.
Every window treatment has its drawbacks, of course — and cordless and corded blinds are no different. If you’re considering cordless blinds for your home, remember that they might not be the best choice if you have very tall windows. That’s because it can be tough to reach the bottom of the blinds when they’re fully retracted.
Cordless blinds can also pose a challenge if you have windows in your home where heavy furniture or another obstacle makes it tough to reach the bottom of the blinds when they’re fully extended. Corded blinds, on the other hand, might last a bit longer than cordless varieties — although ultimately, how long your blinds last will depend on many factors (including how well you take care of them).
When you are tired of dealing with blind cords and want to get rid of them.
If you want window shades that are more convenient to operate than corded blinds.
On the flip side, there are some situations where cordless shades might not be the best option. These include:
You cannot reach the bottom of the blinds when they are fully retracted due to the windows being too tall.
You cannot reach the bottom of the blinds when they are fully extended due to furniture or another obstruction.
In these latter cases, corded blinds may be more appropriate.
Types of Cordless Blinds
When shopping around for cordless blinds, you aren’t stuck with one design or style. In fact, there are many different types of cordless shades to choose from. Here is an overview of the most popular cordless blinds available on the market:
Wood and Faux Wood Cordless Blinds
Blinds made of genuine wood are one of the most popular types of blinds that people use in their homes, and it’s easy to see why — they’re timeless! They suit any kind of decor and can give your home an air of sophistication.
If you’re looking for the look of wood but don’t want to spend as much money, faux wood blinds are a great alternative. They’re made from a mix of wood fibres andPVC, so they’re more durable than genuine wood blinds and can withstand moisture better — perfect for areas like the bathroom or basement.
Cordless Woven Wooden Shades
Woven wooden shades are made from a mat of bamboo or other flexible fibres. The fibres are woven into a mat that can be rolled and unrolled to cover your windows. Although they do let some light through, you can pair them with a blackout liner for extra control and privacy.
Cordless Roller Shades
Roller shades are made of vinyl or fabric and unroll into a single, smooth panel. Their sleek, no-fuss modern design goes well in contemporary and minimalist homes. Roller shades also make an excellent second layer underneath curtains or another type of window blind due to their low profile and minimalist appearance.
Cordless Roman Shades
Unlike their sleeker cousin, roller shades, Roman shades involve pleats and swags of fabric. This makes for a more dramatic window treatment that creates a fantastic focal point in living rooms and dining rooms. Roman shades combine the fabric swags of a curtain with the easy functionality of a window shade.
Cordless Zebra Blinds
Zebra blinds feature two layers of fabric made of alternating stripes of opaque and translucent fabric. Line up the translucent stripes to let in more light or offset them to block it out. Of course, zebra blinds can also be raised and lowered altogether like the other shades on this list. If you want the ultimate light control, then you should definitely check out zebra blinds.
Cordless Mini Blinds
Mini blinds feature slats that are one inch in width or smaller, as opposed to the standard two-inch width; hence, the name mini blinds.Cordless mini blinds are made of durable materials such as PVC and aluminum and are very durable as a result. They are also very affordable, making them a great choice for rooms that get a lot of hard use, such as a garage or workroom.
Cordless Pleated and Cellular Shades
Pleated shades are made of a single layer of fabric pressed into a zigzag pattern. The fabric may be somewhat translucent, giving you privacy while still allowing some light in. Cellular shades are also made from fabric, but they involve two layers crafted into a honeycomb pattern. Because of this, cellular shades offer insulting properties in addition to light control.
Get your cordless shades at Factory Direct Blinds, and we’ll ship them straight to your home for the ultimate convenience. Installing your own blinds is relatively simple, and you can save yourself a lot of money by doing it yourself — money that you can then spend on getting the best window treatments for your home.
If you’re not certain which cordless blinds will look best in your home, take advantage of our free sample program and get samples sent straight to you so you can see what the materials look like in your home. We also have an entire research center full of helpful articles that explain everything you need to know about window shades, includinghow to clean blinds.
FAQs About Installing Cordless Blinds
Are cordless blinds easy to install?
Cordless blinds are one of the easiest window treatments to install. In most cases, you can do it yourself in just a few minutes with these simple steps:
Collect your materials
Measure your window
Drill holes for the brackets
Install the brackets
Hang your blinds
Adjust the slats
Most blinds will come with instructions specific to that product. Be sure to follow those for the best results.
How do cordless blinds stay in place?
Most cordless blinds are held in place with brackets that are mounted on the wall or window frame. The brackets have a slot for the headrail of the blinds to slide into, and they are usually secured with screws. Other types of cordless blinds will have special spring-loaded brackets that grip the headrail, or they may be attached with magnets.
What tools do you need to install cordless blinds?
Before you begin installing your blinds, ensure you have the following pieces of equipment on hand:
Pencil
Tape measure
Leveler
Power drill OR screwdriver, hammer, and nail
Blinds and mounting hardware that came with it
Stepladder
Drywall anchors (necessary if you are not drilling into a stud)
Collect all of these items before you start so you can work quickly and efficiently.
How long do cordless blinds take to install?
The actual time it takes to install cordless blinds will depend on the size and type of blinds you have, as well as your own level of experience. However, in most cases, you can expect the entire process to take no more than 30 minutes.
]]>
https://www.factorydirectblinds.com/blogs/articles/how-to-put-the-chain-back-on-a-roller-blind2024-05-30T06:47:42-07:002024-05-30T06:47:42-07:00How to Put the Chain Back on a Roller BlindVisiture LLC
Source: SOLOTU/Shutterstock.com
Maybe your kids pulled on it, maybe the cat got to it, maybe it was just old and worn out. Whatever the reason, you need to put the chain back on your roller blind, but you don’t know how. In this guide, we walk you through replacing the chain or cord on a roller blind.
Preparing to Replace the Chain on a Roller Blind
Before beginning this repair, you will need to procure a replacement chain or cord for your solar roller shades. It needs to be thin enough you can insert it into the clutch, but thick enough it won’t slip out of place. Bead chain in size #10 is the standard size for roller blinds. However, you should always measure first before purchasing a replacement to ensure you have chosen a chain or cord width compatible with your existing roller blind hardware. You don’t want to go to all the work to replace the chain, only to find you can’t raise or lower the blind!
These steps are the same for either solar shades vs. roller shades. In addition to the new cord or chain, you might also need a screwdriver to assist with the next steps. First, you will need to remove the roller blinds from the bracket. If the blind is currently down, roll it up completely so there is no excess material hanging down from it.
If you have cassette blinds with a valance, remove them either by snapping it out of the fastenings or unscrewing the brackets from the wall. If the chain has a safety clip on it that attaches it to the wall—which it should, because blind cords pose a choking hazard to children—remove that, too. Basically, you want to remove anything that will keep you from removing the roller blinds from the brackets.
Source: Syda Productions/Shutterstock.com
Identify the brackets that hold the roller blind in place and remove any bracket covers. Determine which side has the safety clamp; one side usually has a post to hold the roller in place, while the other has the safety clasp. Open up the clasp and lift the roller blind out of the brackets.
You are now ready to fix the roller blind chain. Remove the clutch—the round plastic on the end which holds the chain—using your hands or a screwdriver. Some clutch models require you to pop open the cap in order to create enough room to remove and replace the cord. First, flip the clutch over to examine the back. If there is no back piece—i.e., you can see the gears of the side controller—proceed to the next step. If there is a back piece blocking you from accessing the gears, there are three ways to remove it, depending on what type of clutch you have:
If you look down at the front of your clutch and notice a hole with a screw in it, removing that screw should cause the cap of the side controller to pop up far enough to access the chain.
If there is a rectangular tab on the back of the clutch’s pointy end, lift that in order to make the cap pop up so you can access the gears of the side controller.
If the bottom end of the clutch is split down the middle instead of one continuous plastic ring, squeezing the two halves together should cause the top of the side controller to pop up.
Source: New Africa/Shutterstock.com
Once you can access the gears of the clutch, remove the broken cord and discard. Next, you will need to take your new chain or cord and thread it into the clutch. If you did not have to open the side controller in order to access the gears, pop the ball chain into the little holes on the gear until the chain moves through the clutch freely. If you did have to open the clutch, simply lay the chain or cord inside the channel, and then close the clutch by reversing the process you did in the previous step.
Reassemble the roller blind and place it back in the brackets. Close the safety clasp on the bracket and test the blind cord by raising and lowering it. Once you have confirmed the replacement cord works, replace any valances and/or safety clips you removed at the beginning of the process.
At Factory Direct Blinds, we offer a wide range of roller shades and blinds to fit all needs or budgets. If you need to outfit a large building with many windows, check out our commercial blinds program for our most competitive pricing.
]]>
https://www.factorydirectblinds.com/blogs/articles/what-are-the-best-blinds-for-bathrooms-choosing-the-best-option2024-05-30T06:47:42-07:002024-05-30T06:47:42-07:00What Are the Best Blinds for Bathrooms? Choosing the Best OptionFactory Direct BlindsPrivacy is important when it comes to choosing window coverings, and it’s even more crucial when selecting the best blinds for the bathroom. Below, we offer four tips for selecting the best window treatments for your water closet and highlight our three favorite blinds for the bathroom: faux wood blinds, mini blinds and vinyl roller shades.
Consider the material carefully.
Due to the high humidity of bathrooms, you need to select the material of your blinds carefully. Fabric shades will trap water, staining quickly and potentially mildewing. Wood tends to warp and crack when exposed to prolonged moisture, and it can also mildew as well. When choosing blinds for the bathroom, you should prioritize faux wood, aluminum and vinyl as your blind materials. Not only are these types of blinds mildew-resistant, they can also be wiped down very easily with cleaning solutions, which is a must for bathroom blinds.
While you might only want partial window coverings to maximize the light in other rooms of your house, you’ll want full window treatments in the bathroom for privacy reasons. Some people do like top-down, bottom-up window treatments that let in the light at the top, but these are generally only a good idea if the bathroom is on the top floor or you don’t have neighbors nearby. Otherwise, neighbors on the top floor of their home might be able to see down into your bathroom. When in doubt, always go for full window coverage in the bathroom.
Think about supplementing frosted glass.
Some bathroom windows come with permanently frosted glass. You can also frost a window yourself using spray paint or temporarily create a frosted window using window clings specifically designed for bathrooms. While these frosted windows do let in some light, they still don’t offer as much privacy as blinds. Even if you already have frosted glass in your bathroom, you still might want to consider adding blinds for even more privacy and light control.
You should regularly clean all your blinds, but this is especially important for bathroom blinds since they are subjected to so much moisture and humidity. Every few months–once a quarter is a good goal to shoot for–create a 1:1 water and vinegar solution. Use it to spray down the blinds and then wipe off excess moisture with a paper towel or clean rag. Regular maintenance of your bathroom blinds will fight off mold and mildew and make your blinds last longer.
Now that you know how to choose bathroom blinds and how to take care of them, you’re ready to buy! Here are our top three picks for the best blinds for the bathroom:
Faux Wood
Faux wood is one of the best blinds for the bathroom due to its moisture resistance, durability, affordability and sophisticated styling. If you have real wood blinds in the rest of your house and want the bathroom to match, faux wood is the way to go. These blinds offer a classic styling that blends with literally any decor while providing excellent privacy and lighting control. These blinds are made of a blend of PVC and wood that holds up well in moist bathroom environments.
Mini Blinds
If you need super durable and affordable blinds for the bathroom, mini blinds should be your top choice. Made of coated aluminum, these blinds are super resistant to moisture and mildew and can withstand tough use. They’re also very easy to wipe down and disinfect. Due to the smaller size of the slats, they fit very well in bathroom windows which tend to be smaller than windows in the rest of the house. If your bathroom windows are odd dimensions, you might need to opt for custom blinds.
Vinyl Roller Shades
If you want blinds that can be completely rolled out of the way when the bathroom isn’t in use, vinyl roller shades are a good option. Regular fabric absorbs moisture and can be slow to dry, but vinyl repels water, making these blinds more moisture-resistant–not to mention they can be wiped down with disinfectant very easily. Just make sure to let them dry before rolling them up so the layers of vinyl don’t trap moisture.
Keep these three options in mind as you shop for the best blinds for your bathroom. If you’ve made your selection and you’re ready to buy, check out our guide that explains how to measure for blinds.]]>
https://www.factorydirectblinds.com/blogs/articles/5-reasons-roman-shades-are-a-must-have-for-winter2024-05-30T06:47:42-07:002024-05-30T06:47:42-07:005 Reasons Roman Shades Are a Must-Have for WinterFactory Direct Blinds Homeowners who experience frigid, snowy conditions will benefit from Roman shades in more ways than one. Discover some of the top reasons below why you should shop these popular window coverings for the winter season. We’ll also explain what to look for when choosing Roman shades so you get the best deal.
1. They Keep Heat Inside
Shades and blinds with large slats or wide openings look light, airy and stylish in the summer. Unfortunately, these same coverings will cause precious warmth to escape from your home in the winter. Roman shades are among the best blinds to keep heat in because they don’t have slats.
The thick and durable material prevents warmth from escaping while restricting the amount of cold air that can come through your windows. Switch to Roman shades before the wintry weather sets in. You’ll find that each room stays more cozy and comfortable.
2. They Increase Your Furnace’s Efficiency
When more heat stays inside, your furnace doesn’t have to work as hard. Since your heat won’t have to turn on as often, this can translate to big savings on your utility bill. Depending on the type of machine you have, your average furnace lifespan should be between 13 and 20 years. Less wear and tear means you can keep your same heater for much longer.
Emergency furnace repairs and replacements chip away at a family’s holiday budget. They can also easily ruin a relaxing staycation. Reduce the chances of enduring a stressful, costly fix by investing in window coverings as a proactive and effective solution.
3. They’re Easy to Layer
Custom-fitting Roman shades are designed to hug the frame of each window in your home. This is one of the main features that helps to keep warm air inside and frigid temperatures outdoors. The design will also allow you to layer them with other window treatments. Hang long blackout drapes over your Roman shades or place winter-friendly cellular shades on top.
The combination will not only look trendy and put-together, but it’ll also make sure your room stays as warm as possible while doubling the effectiveness of your energy efficiency. Many manufacturers’ top products also come equipped with a light-filtering liner so you can sleep in during your holiday break.
4. They Maximize the Power of Sunlight
Most homeowners welcome as much sunlight as possible during the winter months. After all, it’s the most powerful, nourishing and natural form of energy our families can enjoy. Roman shades don’t only increase the impact of warm air—they make the sun more effective. This is important since there are fewer hours of sun during the winter than at any other time of year.
Feel free to leave your shades open when the sun is at its brightest. Close them as soon as it gets shady or you begin to lose light in your home. If you must leave your house for work or leisure, keep the shades shut at all times.
5. They’ll Match Your Winter Décor
Roman shades come in a variety of colors, patterns and styles. Whether you desire a natural hue that will go with any décor or a type of window treatment that perfectly matches your holiday knickknacks, you’ll find exactly what you’re looking for.
If you prefer an elegant yet clean look in your home, try a Victorian-style Roman shade in Daytona Linen or Del Mar Silver. Go bolder with rich solids in seasonal colors like Delray Lacquer or Delray Sprout. Premium prints include opulent brocade, Mediterranean lattice designs and refined stripes.
Roman Shades Make a More Comfortable Winter
While shopping for Roman shades will make your home cozier this winter, they’ll also improve your family’s comfort year-round. The same barrier that works to keep the warmth inside during the cold season will also hold in air conditioning during the summer. Since these window coverings are durable and stylish, they’ll also enhance the look of your home the entire year.
Have your shades custom-fitted for the most impact. Measuring your windows and purchasing them direct from the factory means you will receive quality treatments at the best prices. Now, all you need to do is have your measurements ready and decide on your features and ideal color. In as little as a few days, you will receive your custom shades on your doorstep. These high-performance, beautiful and dynamic window treatments will be one of the best holiday gifts you give your family.]]>
https://www.factorydirectblinds.com/blogs/articles/why-we-love-faux-wood-blinds2024-05-30T06:47:42-07:002024-05-30T06:47:42-07:00Why We Love Faux Wood BlindsFactory Direct Blinds
When it comes to buying the right blinds and shades for a home, that decision can be a difficult choice to make for many homeowners given the number of options there are available these days. However, one type of window covering that is consistently popular due to its affordable prices, elegant appearance and overall durability is
faux wood blinds. Faux wood blinds, while they are designed to look and feel just like natural wood, are actually made out of vinyl, composite wood or PVC. They come in a variety of different colors to perfectly match your home’s aesthetic and are available in either cordless or corded controls. Not only do faux wood blinds improve the appearance of your windows and effectively block out light, but they also perfectly complement many different home decors and other furnishings. When you choose faux wood blinds for your home, you are guaranteed to get window treatments that will instantly enhance the appearance of any room in your home. It’s easy to see why an increasing number of homeowners are considering the benefits of faux wood and see their potential in home decoration. In this article, we will explore all the reasons why we love faux wood blinds (and why we think you will, too).
Real Wood vs. Faux Wood: What’s the Difference?
The right window treatments can really transform the look of your home. Traditionally, wood blinds have always been the style of choice for many homeowners. However, due to environmental concerns, high costs and the need for low-maintenance products, homeowners have turned to faux wood blinds as the more ideal choice. The primary difference between the two is the type of material they’re made from. Wood blinds are made out of real, natural wood and can be stained and painted to match the decor in your room. They are not recommended for high-humidity areas of the home, such as in the bathroom or kitchen, because of natural wood’s tendency to warp or crack with prolonged exposure to moisture.
Faux wood blinds, on the other hand, are typically made out of PVC, although sometimes they’re made from vinyl or composite wood (a mixture of wood and plastic). They have the same realistic wood pattern and can also be stained and painted to match your decor just like wood blinds can.
Benefits of Faux Wood Blinds
1. More Affordable than Wood
One of the biggest advantages of faux wood blinds is that they are a much more affordable option than real wood blinds. With faux wood blinds, you can expect to pay a fraction of the price that you would pay for real wood. However, don’t let the wood “faux” fool you, as faux wood blinds are nearly identical to the real thing. In fact, most people have a difficult time distinguishing between real and faux wood, so your guests don’t even have to know that they are not the real thing.
2. Resistant to Moisture
As we mentioned earlier, wood blinds have a major disadvantage when it comes to moisture and high humidity areas causing them to warp, crack, swell or expand with prolonged exposure. Extreme heat and sunlight can also damage genuine wood, causing it to fade over time. On the other hand, faux wood blinds are resistant to moisture and heat and are a much better option for homes in high humidity areas or for rooms where moisture is a common issue, such as in bathrooms, kitchens and laundry rooms. They are also better at standing up to extreme temperatures than wood blinds are, making them ideal for homes in very hot or cold climates or in areas where temperatures tend to fluctuate within a 24-hour timeframe.
3. Durable and Easy to Clean
Given that faux wood blinds are made using composite materials, such as PVC or vinyl, these blinds can withstand extended periods of wear and tear on a daily basis without bending, warping, cracking or swelling and will stay looking like new with proper care and maintenance. In addition to being durable, faux wood blinds are also extremely easy to clean. Because they are resistant to water damage, they can be washed and wiped down using a damp cloth and a mixture of soap and water. What’s more, they won’t become damaged by cleaning solutions, so you don’t have to worry about ruining them if you need something a little stronger to keep them clean.
4. Come in Many Different Styles
Faux wood blinds are available in many different colors, styles, paints and stains. Plus, you can also have them custom-made to fit your specific needs and preferences. Choose from a range of sizes and colors, as well as what type of control mechanism would work best. Faux wood blinds come with standard corded controls or cordless options that are safer for homes with small children and pets. All these options give you a great deal of flexibility when choosing faux wood blinds for your home.
5. Environmentally Friendly
Most buyers don’t realize this, but faux wood blinds are actually better for the environment. By purchasing faux wood blinds, you are helping to reduce the number of trees that are being cut down. Faux wood blinds are also recyclable, so not only are you making an eco-friendly decision by purchasing them, but you can also help reduce the amount of trash in landfills by recycling them when you’re ready for something new.
6. Insulating
Faux wood blinds are incredibly effective at insulating rooms. Windows are one of the primary locations where homes absorb the hottest air during the summer and lose heat during the winter. Protecting your windows with faux wood blinds can help block out some of the heat that comes from the sun during the summertime and keep warm air in during the frigid winter months, making your home much more energy efficient and helping you save money on your monthly utility bills.
7. Privacy
Like any effective window treatment, faux wood blinds provide you and your family with privacy by preventing people from being able to see inside your home, allowing you to feel secure without the fear of being observed. They’re much thicker than other styles of blinds, ensuring that the inside of your home can’t be seen by nosy neighbors or anyone else who may be snooping around outside.
Choosing Between Real Wood and Faux Wood Blinds
When it comes to choosing between real wood and faux wood blinds, that decision is based on a variety of factors. First, you will need to decide what your preference is. Although faux wood blinds are virtually identical to natural wood blinds, some people prefer the real thing and don’t mind the higher cost of genuine wood. However, they still would not be able to install them in areas where they could become damaged by moisture and humidity. If you are on a budget and you like the look of faux wood blinds as much as real wood, then these blinds will work perfectly for your needs. Another option is to purchase a combination of both.
Something else you’ll have to take into consideration when shopping for blinds is how often you plan on changing up your home’s decor. If you think you will be making dramatic changes to your home’s color scheme sometime in the future, then you will need to think about the costs of re-staining or completely replacing your blinds for something new. Keep in mind that faux wood blinds can’t be re-stained if your design preferences change, so if you want a new color for a room in your home, you will need to purchase a new set. Again, bathrooms, kitchens, laundry rooms and other areas of your home where there is an accumulation of moisture require faux wood blinds, as do homes in moist climates.
If you are still not sure whether you want faux wood blinds or real wood, consult with the manufacturer or a window blinds expert who will be able to help you understand the differences between the two and work closely with you to determine the best window treatments for your style, budget and preferences.
Ordering Faux Wood Blinds Online
When it’s time to purchase faux wood blinds for your home, ordering online is simple. The first decision you’ll need to make is whether you want corded or cordless controls. Cordless blinds are safer for homes with small children and pets and offer a much more seamless look. However, if your windows are wide or larger than normal, then you may need corded blinds. Next, you will need to determine what size your windows are so that you can provide the manufacturer with the correct measurements when placing your order. You will need to choose a mount type first—either inside mount or outside mount—and then calculate the measurements of your windows accordingly. Then, decide on a color. Faux wood blinds come in a wide spectrum of painted colors, from smooth whites and creams to wood tone colors, such as hazelnut, mahogany, tigerwood and more. Once you’ve made all your selections and customizations, it’s time to place your order and wait for your new faux wood blinds to arrive at your doorstep!
How to Install Faux Wood Blinds
Once you receive your faux wood blinds, installation is easy. In fact, a screwdriver is all you will really need to get the job done. First, carefully unpack your blinds and mounting hardware and make sure you have everything you will need. Most blinds come with three brackets—two for holding both ends of the head rail and one for supporting the center—although this could depend on how wide your blinds are. Position your mounting brackets and use your screwdriver to fasten screws into each. If your faux wood blinds come with a valance, then attach that to the front of the head rail before mounting the blind. Next, slide the head rail into the brackets and snap it in so that it is secure. To complete your installation, lower and test out your new blinds to make sure they look and function as they should. If everything looks good, then your faux wood blinds are ready for use!
Let Factory Direct Blinds Help
If you are ready to order faux wood blinds, but have questions or aren’t sure where to start, turn to the experts! At Factory Direct Blinds, we are ready to help you get started on your next home improvement project and help you select the right custom blinds for your home. Contact us today or give us a call at 1-800-355-2546.
]]>
https://www.factorydirectblinds.com/blogs/articles/how-to-pick-commercial-window-shades2024-05-30T06:47:42-07:002024-05-30T06:47:42-07:00How to Pick Commercial Window ShadesFactory Direct Blinds
Did you know that studies have shown that there’s an ideal temperature and brightness for office environments (68-70 degrees F. and natural lighting, respectively). The way you decorate your office or commercial environment can have a big impact on productivity and employee happiness, so it’s well worth your while to put in the effort to pick the right finishes. Selecting commercial window coverings is one way you can help tailor your workspace to the perfect temperature, brightness and style for happy, productive employees. If you run a customer-facing business, the right window treatments also enhance the environment for guests and visitors.
When shopping for window treatments for your business, you need to be conscious of various factors you probably wouldn’t consider when shopping for your home, such as durability and flame resistance. Depending on what kind of business you have, you’ll also want to consider functionality—do you need privacy, temperature regulation or resistance to moisture? All of these things should be addressed when choosing commercial window shades. Here are some more important considerations.
1. Know the Purpose of the Shades—Before you dive into any window treatment buying endeavor, it helps if you make a list of needs and wants. As previously mentioned, natural lighting is best for offices, so you want to provide that while still achieving privacy, light control, temperature regulation and other factors. What are the primary and secondary purposes of your window treatments? Privacy may be needed in executive offices, while light filtration or tempering may be key in sun-drenched spaces. It may be important to you to keep light out or in to help reduce your company’s energy consumption or to maintain a certain temperature for your inventory. You may want to achieve multiple goals with your shades, and that’s just fine!
2. Consider Special Features—Unsurprisingly, your commercial window treatments may need features that wouldn’t matter much in your home. For example, you may be bound by your building code or local laws to meet certain safety standards with walls, flooring and window coverings. You may need to meet California’s laws regarding flame-resistant materials. The environment will also determine which features you should seek. If it’s a relatively damp environment or somewhere where liquids are used, then it may be smart to go with faux wood blinds that are less likely to warp or swell when exposed to moisture.
3. Consider Durability and Maintenance—As a general rule, products labeled “commercial” tend to be stronger, tougher and longer-lasting. There’s no real secret as to why—busy workspaces see a ton of action and may be exposed to more harsh products than homes. The type of workspace you’re outfitting, such as a warehouse, office or studio, will help determine whether or not you need extremely durable shades. Luckily, there are options available for even the most demanding spaces.
4. Determine if You Need Custom Sizing—Typically, our commercial customers need custom window coverings due to the fact that their windows are not a standard size and there may be a lot of variation from one window, room or floor to the next. With that being said, it’s possible that your space can be outfitted with standard sizes. Every space is different, so it helps if you know your sizing requirements before you go into the commercial shade shopping process. Having a rough idea of size will help you nail down whether you can buy “off the rack” or not.
5. Find a Good Partner—The last thing you need to do before placing your order is to seek out a good partner for your commercial window job. Factory Direct Blinds is a great commercial window coverings supplier for a wide range of institutions and businesses, and we always do our best to ensure that you get the perfect solution for the best possible price! We’ve worked with offices, hotels, retail stores, restaurants and so much more, and there’s virtually no commercial space we can’t outfit with top-notch, commercial-grade shades or blinds.
Let Us Help
Ready to talk to an expert? The team at Factory Direct Blinds is ready to get started on your big job. We’d be happy to provide you with a bid on commercial treatments so you can gauge how our prices work in your budget. To begin, simply send us a message or give us a call at 1-800-355-2546.]]>
https://www.factorydirectblinds.com/blogs/articles/6-reasons-to-install-your-own-shades-and-blinds2024-05-30T06:47:42-07:002024-05-30T06:47:42-07:006 Reasons to Install Your Own Shades and BlindsFactory Direct Blinds
Intimidated by the thought of installing your own custom shades or blinds? Banish the notion that you can’t do it. We know you have it in you. Why are we so certain? Because after 25 years in business, all of us at Factory Direct Blinds have coached thousands of customers just like you through the process. If they can hang their own window coverings, so can you.
Keep reading to learn everything you need to know to get it right the first time—starting with a half-dozen reasons it really is worth the effort.
6 REASONS TO INSTALL YOUR OWN WINDOW COVERINGS
No matter how many (or how few) home improvement projects you’ve tackled so far, this is one even an absolute beginner can master. Trust us, if you can put together a simple bookshelf, you can handle this DIY blind installation. It’s just that easy!
Let’s get down to the compelling reasons you should put this task on your must-do list. Here are the big six that make it worth the effort to learn how to install blinds yourself.
Save money
By far the best reason to learn how to install window shades is the cost savings. If you’re working within a budget, why invest in a service you can easily do yourself? This is especially true if money is tight. If you’re purchasing less expensive blinds or shades, a significant portion of your home improvement budget will be spent on labor. When you DIY, you can put that money into other areas of your house or back into your bank account.
Do it on your own schedule
Whether you’re married with children, partnered up with pets, caring for a parent or 100 percent single, you have a busy schedule. You don’t want to burn a personal day on a blind installation—and you shouldn’t, not with something this simple. Installing window shades should take a few hours. Pick an afternoon—or an evening or morning—that suits your schedule and forget about the “sometime between noon and 5 p.m.” waiting game.
Learn more about your blinds or shades
If you hire an installer right off the bat, you’ll likely feel like you need to call in a pro every time you have a problem with your window coverings. When you’re the one wielding the screwdriver, though, you’ll be the expert. Plus, you’ll have a direct line to your manufacturer or retailer. That means you can ask all those niggling little questions you have about the best way to measure your windows for your style of choice. This is especially true for renters, who can not only save money by installing their own blinds but also gain the ability to take the blinds with them once their lease is up since they know exactly how they were installed.
Get it done exactly the way you want
Sometimes the best job is the one you do yourself. When you bring in an expert to tackle a home improvement project, it’s easy to feel out of your depth when you point out a problem. Many customers who use an installation service tell us that they were uncomfortable asking installers to redo things that weren’t perfect. Sometimes, installers don’t pay any mind to codes and regulations, leaving behind unsafe blinds. This can be troublesome for homeowners when they get their home appraised or go to resell it. In the end, the homeowners regretted their choice and wished they’d done it themselves.
Gain confidence with DIY home improvement projects
Window shade installation feels like a huge project because it makes such a big difference in your home. In reality, though, it’s an install that takes just a few hours, which is probably less time than it will take you to paint a room. It’s minimal work for maximum result. Once you step back and realize you’ve completed your task, you’ll feel like you can conquer the world. Or, at the very least, the next project on your to-do list.
Bragging rights
Did we mention that every time you have guests over, you can casually point out your custom blinds or shades and say, “Don’t they look good? I installed them myself, of course.” Feel free to brush off your shoulders and pat yourself on the back. You deserve it!
EVERYTHING YOU NEED TO INSTALL YOUR OWN BLINDS OR SHADES
One of the things that makes this project so doable for the average homeowner is that it doesn’t require any special equipment. In fact, even if you don’t own everything listed here, it should be easy to borrow these items from a family member, friend or neighbor.
If you do need to make a run to the hardware store, know that these won’t be one-time use purchases. You’ll use them over and over again for other home improvement and craft projects. With that in mind, invest in quality tools that will stand the test of time. Look online for reviews as you search for the ideal power tools and other equipment for your situation.
Ready to get to work? Whether you’re getting ready to install blinds, shades or curtains, here is the equipment that you need for a basic DIY blind installation:
Stepstool or ladder
Tape measure
Pencil
Drill and drill bit
Level
Screwdriver
Hardware, which should come with your blinds or shades. You might need wall anchors if you find yourself drilling into dry wall rather than studs or a wooden window frame.
HOW TO FIND BLINDS AND SHADES YOU CAN EASILY INSTALL YOURSELF
The general rule for ease in DIY blind installation is this: The more pieces a window treatment has, the more complex it will be to install. That doesn’t mean it’s impossible, even for a beginner. It just might take more time or effort to get it all done.
Which types of blinds and shades will take longer for you to install? Here’s our shortlist:
Wider shades
A shade that fits a wider window will be bulkier and more cumbersome to handle, especially if you’re working by yourself. Depending on how large your windows are, you’ll also be working with more than two brackets. If you have windows of different widths, work on the narrow windows first so that you can figure out exactly what you’re doing without struggling with a larger window covering.
INSTALLATION TIP:While the middle bracket is mounted in the center of our window covering, you actually should attach it slightly off-center so that it doesn’t interfere with the movement mechanisms of the blind or shade. Whether you shift it a bit to the right or a bit to the left doesn’t matter. Just make sure the bracket doesn’t interfere with any cords or cables.
Vertical blinds
While vertical blinds are installed using the same basic installation method, they do come with the additional task of attaching each individual vertical blind, or vane, to a clip. It’s an easy task, but an extra one.
INSTALLATION TIP:Before you begin sliding the vanes into their clips, rotate the clips outward using the wand. This way, you’ll be able to clearly see where to insert the vanes. No more fiddling around guessing about where exactly your vanes go!
Outside mount window coverings
There are two ways you can install a window treatment like blinds or shades: an outside mount or an inside mount. An outside mount sits directly on the window frame or outside of it. An inside mount sits inside the window frame and doesn’t obscure any of the moldings surrounding the window itself. An outside mount is slightly more complicated because you’ll need to install the valance, which covers the exposed top of the window treatment.
INSTALLATION TIP:The valance attaches to your blinds or shades using two (or more) plastic clips. Slip these on to your window treatments before you mount them onto the brackets. That’ll make installing the valance a literal snap.
Motorized blinds and shades
These are more difficult to install because they require a power source. Motorized window coverings are powered by a few different methods. Some use batteries, some are hard-wired into your home’s electrical grid (which will require you to hire an electrician), some are solar-powered and some plug directly into an outlet the same way a lamp does.
Battery-powered motorized window treatments are the simplest for homeowners to install themselves, although you’ll still find yourself needing to connect wires to a motor built into the blind or shade’s mechanism. However, as with all battery-powered items, you’ll need to replace those batteries periodically. Batteries can also make this option more expensive in the long-term, although the convenience might be worth it for you.
INSTALLATION TIP:If you’re considering installing motorized window coverings that require an outlet for power, be sure to measure the distance from the nearest electrical outlet to the top of your window when you measure the size of your window.
If you’re not sure whether the window treatments you want to put up in your home are DIY-friendly for a home improvement beginner, don’t hesitate to call the company you’re ordering your blinds or shades from. Their customer service department should be able to answer any questions you have—or connect you with an in-house installation expert who can.
There you have it! Everything you need to know about installing your own blinds or shades and you learned right here.
As you work through your window treatment installation, remember to take it one step at a time. Measure twice, drill once. And if you mess up? Well, it happens to the best of us! Any mistake you make can be fixed. But honestly? We’re pretty sure you have this home improvement project in the bag.
]]>
https://www.factorydirectblinds.com/blogs/articles/the-11-most-summer-inspired-window-treatments-for-your-home2024-05-30T06:47:42-07:002024-05-30T06:47:42-07:00The 11 Most Summer-Inspired Window Treatments for Your HomeFactory Direct Blinds Summer is almost here, which means you and your family are getting ready for longer days and warmer temperatures. If you do not have the appropriate window treatments for the season, it may also mean less energy efficiency for your home, including higher power bills. You can maintain your summer budget, entertain guests comfortably and improve privacy during your holiday travels with a new set of shades or blinds. The best summertime varieties block out light and heat. When necessary, they are also capable of reducing visibility of and from the outside world.
If you are still unsure about which type to choose, there are many custom options available to consider. Manufacturers and homeowners alike recommend a few of their favorite seasonally inspired options, and we’ve compiled some of them here for you.
Cellular Shades
Lightweight and modern, cellular shades have a durable honeycomb structure that creates a beautiful aesthetic. These treatments are ideal for a variety of homes, including those with large windows and patios. You can also install them in any room that faces the sun or experiences many hours of sunlight. Because cellular shades help to block heat, they will insulate your home, decrease brightness and give you an appropriate amount of privacy. They are also an excellent choice for porch doors and window doors.
Single-cell light-filtering technology will block out less light and heat, while double cells will provide more heat protection and fuller darkness than many other window treatment options. Blackout styles will let almost zero sun in. If you are interested in a model that is both safe and easy to use, consider going cordless. Options without a cord will keep your children, pets and guests safe.
Keep a clean look by purchasing a brand with hidden brackets. Whether you prefer white, natural brown or black, there tasteful cellular shades are also available in nearly every color. Choose these coverings if you live in a hot climate, have a vacation home or simply want to make your home look more appealing. While they are the ideal summer treatment, these will protect your residence from nosy neighbors and extreme temperatures all year long.
Drapes
No matter the specific style, drapes are one of the most effective window coverings for blocking out light and heat. While your current style may be outdated, purchasing a new set of modern and opaque treatments will quickly upgrade your home’s summer look. These styles are ideal for a more classic or traditional decor.
If you are looking to stand out while staying tasteful, drapes also come in a variety of patterns, colors and materials. While drapes bring a variety of heat-relieving benefits, closing your treatments during the day will decrease the chances of your HVAC kicking on. These coverings are not only ideal for summer; they will also help keep cold out during the winter months.
Roller Shades
Roller shades are summer-friendly and come in several different types of materials. As their name suggests, they roll down from the top of your window to provide the right balance of natural light and privacy. Like the other selections on this list, they will effectively reduce glare and heat. They are also easy to use. Whether you need to sleep during the day or want to enjoy a nap after a trip to the pool or beach, they will also efficiently block out the sun.
You and your family may choose from a variety of colors, including trendy white, off-white and grey. You can even select from uncommon hues like hunter green, navy and chocolate. If you are interested in a style with more personality, roller shades also come in many patterns, from tropical to simplistic. Choose these window treatments to complement your home’s sleek, modern and unique look.
Solar Shades
Solar shades and screens are made of an innovative vinyl mesh material. These treatments are perfect for summer because they are specially made to block out light and heat. They come in standard or reverse wall mounting to fit your window’s needs and your family’s preferences. From cream to brown, there are a variety of on-trend colors available.
While all styles will reduce glare, many types will not completely eliminate natural light. This style offers varying degrees of shade, giving you the flexibility to choose the amount of light you want to let in and how much you can see out. Most products provide between 1 and 15 percent light reduction, while other types can provide complete blackout. Place your favorites on kitchen and bedroom windows, patio doors and even your backyard porch. Whether you are having a party, reading a book or enjoying the warm air, you can find the right mixture of heat relief and ambiance.
Roman Shades
If you are looking for an opulent yet timeless summer style, consider purchasing a set of Roman shades. These window treatments are one of the most popular selections this year because they are on-trend and come in many plush fabrics. They stack together evenly when open, giving your windows a continuous, tidy look. They also come complete with fine details, such as European stitching and bold patterns.
Some brands include a light filtering layer, while others have a convenient continuous loop in the headrail. When you select Roman shades, you can choose from fun or elegant patterns like flowers, paisley, stripes and woodgrain. Popular colors include cork, graphite and sandalwood. Depending on your budget, you can add blackout or privacy lining to your Roman style for the ideal degree of light and temperature control. Talk to your window treatment manufacturer about your options.
Wood Blinds
If you are looking for a rich summer style, authentic wood blinds add instant character and beauty to your space. Thick, durable slats made of vibrant and strong materials like bamboo and basswood effectively block out light and heat. If you are looking for coverings that will stand the test of time, real wood blinds last longer than plastic, PVC or composite coverings.
Choose from a spectrum of grains and finishes, including pecan, maple and cherry. You will also find peace of mind in knowing that each treatment is responsibly sourced from the finest wood found globally. While these blinds are eco-friendly, they will also help reduce your power bill, further increasing your positive footprint on the environment.
Faux Wood Blinds
If you are looking for a more affordable summertime treatment with the same look as authentic wood blinds, consider a faux style. Faux wood coverings are made from composite wood, PVC or vinyl. Like natural wood, you can choose from a variety of colors and finishes, including acorn, butternut and cloud white. If you are interested in a richer look, you can select mahogany, cherry and dark walnut.
While faux wood blinds are a trendy way to keep out light and heat, they are also an excellent style for rooms with increased moisture. Bathrooms, kitchens and humid living spaces will benefit from these blinds that resist both moisture and swelling.
Dual Shades
Often found in hotels and resorts, dual shades are highly effective for keeping out light and heat. Each type of dual shades features a lightweight, highly reflective side and a darker, heat-absorbing layer. They are also reversible. While the reflective side should face the window in the summer to keep heat out, the darker layer can be positioned outward in the winter to ensure heat stays in. Like roller shades, you can shop for your ideal treatment in the patterns and colors you prefer.
Woven Wood Shades
Woven shades are just as eco-friendly as authentic wood shades. They offer a natural, exotic look that is perfect for summer décor. While they are more expensive than other wooden options, woven wood shades are also a unique alternative to more conventional window treatments. They will make your home stand out. Each woven fixture is available in a variety of unique materials, including bamboo, jute and various grasses. Select from colors like grey, tortoise and honey, as well as different thicknesses. With woven wood shades, you will block out light and heat while maintaining your privacy.
Zebra Shades
Zebra shades are so-named for their unique, alternating sheer and light-filtering materials. If you desire a combination of natural light and effective room darkening, consider this style. Each shade provides several degrees of light adjustment. Align the sheer or opaque sections to provide the right level of light, from blackout to full sunshine. Choose from beautiful colors like natural, chocolate and ivory for a relaxing summer ambiance. Other options include marble, wheat and vanilla.
Whether you prefer inside mount or outside mount, a variety of sizes are available to you. Some brands even come with a state-of-the-art motorized option, allowing you to raise or lower your shades with the push of a button. Powered by efficient lithium ion batteries, the remote functions via radio technology. You can also upgrade to a multi-channel remote to control all of your shades at the same time.
Shutters
If you want a summer-friendly option that lasts all year long, plantation shutters and wood alternative shutters are just a few of the long-lasting options available. Like the other treatments on the list, shutters effectively block out light and heat. These fixtures are ideal for serving as a permanent solution for homes that experience extreme temperatures. They can also provide air circulation while eliminating the glare of the sun. Install them inside or outside your window for optimal privacy and light control. While increasing insultation and reducing energy costs, shutters are also a long-lasting, durable investment.
Like blinds, drapes and shades, shutters come in many colors and materials. In addition to composite and vinyl, you can also purchase these treatments in synthetic foam and authentic wood. Choose from brown, wicker or grey to match your interior or exterior. Other popular colors include burgundy, forest green and dark blue.
Selecting Your Summer-Inspired Treatments
The best window treatments for summer will allow you to let light in your home when you want it, while reducing glare and heat during the warmest parts of the day. They also look stylish, are created with durable materials and offer many patterns and colors to match your interior décor. Whether you prefer authentic bamboo blinds, classic dual shades or trendy Roman shades, the options listed here will help you save energy, protect your safety and privacy and ensure you and your guests stay cool.
These selections will also help during the colder seasons of the year, providing the protection you need to keep the chill away. If you are still deciding between shades or blinds, consider your home’s style and the needs of your family. Solar shades, for example, will give you a sleek look and allow enough light in to shady rooms. Faux wood blinds will help you save money while completing your modern interior design scheme.
]]>
https://www.factorydirectblinds.com/blogs/articles/how-to-measure-your-windows-for-custom-shades-other-window-treatments2024-05-30T06:47:42-07:002024-05-30T06:47:42-07:00How to Measure Your Windows for Custom Shades & Other Window TreatmentsFactory Direct Blinds
custom shades and blinds will quickly upgrade the look of your home. These sought-after treatments are designed and manufactured to fit each of your window’s specific measurements, ensuring the proper fit and style for a sleek and trendy appearance.
If you purchase custom treatments directly from the manufacturer, you will save time and money. The only tasks you need to complete are measuring your windows, paying for them and receiving them directly at your door. Explore the steps of the process here, and learn how to measure your windows easily and effectively.
Decide on Your Style
The first step is to decide whether you prefer vertical or horizontal shades or blinds. Once you make this choice, determine if you will install them by inside or outside mount. As their name suggests, inside-mounted blinds fit inside your window frame. This style provides the most polished look.
If you prefer outside mounted blinds, they will fit outside your window’s frame. This configuration allows for flexibility in case you switch them to another place or purchase new windows.
Now that you know the types of blinds or shades to choose from, you can get ready to measure your windows.
Grab the Right Tools
Pick up a measuring tape, a pencil or pen and a piece of paper or a notebook. The tape will help you determine your numbers, and your writing utensil and paper will allow you to record them. Once you have your data, you can take it to your window treatment manufacturer to create your custom shades or blinds.
Measuring Inside- and Outside-Mounted Shades
Shades require a unique approach. If they will be inside mounted, ensure the window depth is at least two to four inches. Measure the width at the top, middle and bottom. Record the dimension that is the narrowest. Next, take your height recordings at the top, middle and bottom, extending the measurement only to the top of the sill. Write down the longest number. Finally, measure on the diagonal. Should the two recordings remain unequal, ask for an outside mount application.
For outside-mounted roller shades, record the correct width, and include any overlap you would like. Most homeowners choose three inches on each side. Now, record the height, adding inches for any extra fabric you’d like.
Measuring Inside-Mounted Horizontal Blinds
If you are measuring inside-mounted horizontal blinds, you will need to measure the width at the top, middle and bottom of your window. Once you do this, record and highlight the width that is most narrow. Provide exact measurements, including quarter or half inches. Your factory will help you use this number to accommodate any necessary mounting brackets.
Now, you should measure the window height at the left, right and middle. Take the number of the longest height and give these measurements to the factory.
Should you desire outside-mounted horizontal blinds, measure the width of your chosen window. Add three inches for overlap to your final number. Next, measure the height from the highest point of the headrail to the sill. If you do not have a sill on your window, measure to where you want the bottom of your blind to rest. Tack on one and a half inches to the height to help keep light out and ensure your privacy.
Measuring Inside-Mounted Vertical Blinds
For inside-mounted vertical blinds, first ensure that the window casing is at least 2 ¾ inches to 3 ¾ inches deep. Next, measure the width from the top to the sill in a few separate places. Use the smallest dimension you record to determine the actual blind width. Now, it is time to measure the height. Record another three or four measurements and choose the longest number. Finally, measure the window diagonally in a couple of different places. If the dimensions do not come up equal, tell your manufacturer you want an outside mount application. This will improve the appearance and function of the blinds.
Measuring Outside-Mounted Vertical Blinds
Make note of the window’s width, including any molding or frames around it. Add three inches for each side to keep light out. Second, measure the height of the window from top to bottom. If you have a sill, extend your measurement past it. Add another three inches to this number for mounting. The manufacturer will not make allowances on this outside mount, so be sure to double check your recordings.
Measuring Other Treatments
If you are interested in measuring for another type of treatment, contact your shade or blind manufacturer. They will tell you how to determine your number and which deductions to add or take out. The process is worth it, as custom window coverings will make the interior and exterior of your home look neat, charming and tasteful. Window treatments that fit appropriately also help keep your home secure and increase your energy efficiency.]]>
https://www.factorydirectblinds.com/blogs/articles/new-year-new-window-coverings2024-05-30T06:46:37-07:002024-05-30T06:46:37-07:00New Year, New Window Coverings!Brittany Gordon
Step 1: Measure
At Factory Direct Blinds, we have a simple, easy to follow guide that takes you through the entire process of measuring to ensure that your window treatments not only look beautiful but will fit like a glove. /how-to-measure
Step 2: Picking a Window Treatment
This may seem like the most difficult step. There are many options from roller shades to mini blinds. It's best to look at each window individually and figure out what will best work for it. Then do your research. Pinterest is one of my favorite sites when I'm looking for inspiration or ideas. We offer free samples, that way you can touch it and see it before you buy it!
Step 3: Ordering
Once you've made your choice of window covering and you have your measurements, you need to place your order. We offer a live chat option if you have questions or you can call or email us and we will be happy to walk you through the ordering process. As always, shipping is free and there is no sales tax on orders shipped outside of California.
Step 4: Installation
Installation is easier than you think. We have complete installation guides here. Also we are available to answer any and all questions you may have.
Step 5: Enjoy
This may be my favorite step. New window treatments can add so much to a home. They can be beautiful and functional as well. Once you find the perfect window treatment you'll wonder how you ever lived without it!
]]>
https://www.factorydirectblinds.com/blogs/articles/crazy-creative-holiday-wreaths2024-05-30T06:46:36-07:002024-05-30T06:46:36-07:00Crazy & Creative Holiday WreathsFactory Direct Blinds
Not all holiday wreaths have to be made of garland. Adding a fun twist to this beloved holiday can make your home stand out. Let your creative mind soar, the wreath options are endless.
Extremely Pink & Bright, this wreath screams girly and creative. It still feels like Christmas since everything used to make it is ornaments. This not only can be used on a front door but can also be used in your home as a main focal point.
Bring back the old memories by adding old vintage toys to a simple tinsel wreath. What better way to add holiday fun and flare to your decor.
Do you have a certain theme in your home that you want to incorporate with your holiday decor? Adding in small obvious trinkets can give people the obvious theme your going for. If your home is mainly decorated Hawaiian, adding seashells, ornament bulbs of sand and a cute flamingo can tie it all in perfect.
Calling all wine lovers! Starting off your wreath with tons of hot glue gunned corks with small bits of cranberries make for the perfect wreath. This can be the perfect addition to a kitchen wall or dining room wall as well as the front door. It shows the perfect amount of creativity and its simple to make.
A very Merry Victorian Christmas. The photo of this wreath pretty much sums itself up. Gorgeous blush faux roses and grapes can start the wreath off perfectly, adding in feathers and bows can be great fillers and to tie in Christmas add a little angel figurine.
A Christmas wreath made of Pom-Poms! Simple things that can be found at a craft store hot glue gunned to a wire wreath. Beyond adorable and bright, add in gold reindeer figurines & bells can add in more of a "Christmas" look.
]]>
https://www.factorydirectblinds.com/blogs/articles/did-you-see-that2024-05-30T06:46:36-07:002024-05-30T06:46:36-07:00Did you see that?Factory Direct Blinds
November 14, 2016 was one for the books. From earth we were able to see the Largest and Rarest Moon, called the Super Moon. A Super Moon is when the moon is closest to earths orbit, while coincidentally being a full moon. Here are 10 fun facts about this incredible phenomenon.
The last time we were able to see a Super Moon was January 26, 1948.
This will be the largest and closest Super Moon we have seen since 1948.
The Super Moon is visually larger up to 14% and Shines 30% brighter.
Astrologer Richard Nolle first came up with the term Super Moon stating on wikipedia "... a new or full moon which occurs with the Moon at or near (within 90% of) its closest approach to Earth in a given orbit (perigee). In short, Earth, Moon and Sun are all in a line, with Moon in its nearest approach to Earth"
This Super Moon is also known as the Beavers Moon, since it arrives in the time of year on the Northern Hemisphere when hunters set traps before the water freezes over, to ensure they have enough warm furs for the winter.
On average the moon is about 238,000 miles away from earth, but with the super moon it is a little closer being 221,524 miles away.
The closest full moon of the Century will fall on December 06, 2052!
There will be noticeable differences with the tides during this Super Moon since the orbit of the moon does affect the earths surface.
The closest Super Moon/Full Moon was in January of 1912. It was just under 100 kilometers closer than the Super Moon on November 14, 2016.
According to NASA the moon becomes full about 2 hours before "perigee" (the point in the orbit in the moon when it is closets to earth) making this an extra super moon.
Keep your eyes peeled for the next Super Moon it should be a out of this world site to see!
]]>
https://www.factorydirectblinds.com/blogs/articles/spooktacular-halloween2024-05-30T06:46:36-07:002024-05-30T06:46:36-07:00Spooktacular HalloweenFactory Direct Blinds
Fun and Easy decor for a Spooky Night!
Decorating with paper bats is fun and easy. They can be made or purchased and be taped to a wall or hung from a ceiling. If you want to get even more creative, hanging them from tree branches in your yard or in faux tree in your home will work too!
Tons of old homes were built with Fireplaces, these can be a great way to decorate for any the holidays. Tons of trinkets and pumpkins can be added to your homes mantle and they don't have to be too expensive. Dollar store finds are always great for this type of decorating!
Spider webs galore are a cost efficient way to add quick Halloween Flare. Its a fun thing for kids to do especially when they are able to throw the spiders into the web. Spider Webs can be used to decorate pretty much any where, outside, stairs, even your living room!
Pumpkins have always been a popular way to incorporate the holiday spirit into your home decor. They are fun for the kids to decorate, even for the adults to decorate. Having tons on your porch all shapes and sizes can be awesome to light up Halloween Night.
Porch decorations will be the first thing Trick-Or-Treaters will see when they walk up to your home. Simply adding a Halloween Wreath and pumpkins can be perfect if you don't want to put too much work into it.
"Ghost & Goblins, Spooks Galore, Scary Witches at your door, Jack-O-Lanterns Smiling Bright, Wishing you a Haunting Night!"
]]>
https://www.factorydirectblinds.com/blogs/articles/whats-trending-window-nooks2024-05-30T06:46:36-07:002024-05-30T06:46:36-07:00What's Trending: Window NooksFactory Direct Blinds
Window treatments are a necessity when it comes to nooks. Especially at a reading nook! You do not want to be sweating while you are reading a peaceful book about the country side. Woven Wood Shades will make you at one with your book. And when the sun rises while you eat at your kitchen nook, you are going to wish you had some Wood Blinds to protect you while you adjust to waking up.
All in all, this is a trend that needs to be taken advantage of! If you have a window, you have a potential space for comfort and relaxation! If you want relaxation, you're going to need a window treatment!
Call 1(800)355-2546 for your window treatments!]]>
https://www.factorydirectblinds.com/blogs/articles/diy-roman-shade-fail2024-05-30T06:46:36-07:002024-05-30T06:46:36-07:00DIY Roman Shade... FAIL!Brittany Gordon
You may have seen a few pretty nice looking homemade roman shades, but how safe are they? When you have children, safety is always the most important thing. Making a shade may seem fun and more affordable, but something that is not professionally done doesn't have that safety factor. Our Roman Shades are built with safety in mind. They are also available cordless which is perfect if you have small children or pets running around.
Time is another huge part in DIY. Making a shade is not just an hour long project. After you have everything together, make sure you have some patience.
Here are some examples of some really badly built roman shades. We at Factory Direct Blinds want to save you from this! We offer free samples which takes to guess work out of wondering if your shade will match.
We want to save you from a possible catastrophic window covering. Our friendly staff is here to answer any questions that you may have. Always feel free to give us a call or send us a live chat!]]>
https://www.factorydirectblinds.com/blogs/articles/valentines-day-fun2024-05-30T06:46:36-07:002024-05-30T06:46:37-07:00Valentine's Day Fun!Brittany Gordon
Who doesn't love bacon? I can't think of a better way to start Valentine's Day than with bacon. Simply lay bacon in the shape of a heart on a cookie sheet and bake. This would go great with heart shaped pancakes and pink milk!
After a yummy breakfast, I'm ready for some treats. Rice Crispies treats are super simple and quick to make. Use a heart shaped cookie cutter to make them into the perfect Valentine's Day goody to share with all of the friends I love. Add a stick for easy dipping and eating!
These cute wafer cookies are a wonderful thing that kids could help out with. They are great for taking to teachers at school, or send them to work with your husband. They are a great alternative for when you don't feel like baking!
This is something I definitely plan on doing. So much easier than trying to find a heart shaped pan that you only use once a year. It's a very easy, yet festive dessert that you can make the day before, leaving you with one less thing to worry about!
Decorating for this day of love should be fun and inexpensive. Get the kids help by having them cut hearts out and tape them on a string. You can even write what you love about each other on each heart.
Buying valentines for all the kids can get pricey. I love this adorable, homemade idea. Simply buy a bag of Teddy Grams, make cute tags and finish it off with a fun ribbon. This is also perfect for schools that do not allow sweets.
This is also a wonderful alternative to the typical candy cards; and who doesn't love cuties?
Be sure to follow Factory Direct Blinds on Pinterest for even more holiday ideas and the latest in all things blinds!
]]>
https://www.factorydirectblinds.com/blogs/articles/happy-veterans-day-from-factory-direct-blinds2024-05-30T06:46:24-07:002024-05-30T06:46:24-07:00Happy Veteran's Day From Factory Direct Blinds!Brittany Gordon
Here at Factory Direct Blinds we would like to give all of our veterans a huge THANK YOU for all that they do. Because of them we are blessed to live in a free country. We appreciate all the sacrifices that they and their family's have made.
]]>
https://www.factorydirectblinds.com/blogs/articles/holiday-window-display-contest2024-05-30T06:46:24-07:002024-05-30T06:46:24-07:00Holiday Window Display ContestBrittany Gordon
Holiday Window Display Contest on Pinterest
Factory Direct Blinds is pleased to announce their very first Pintrest Contest to be held November 5, 2013- December 31, 2013. Factory Direct Blinds is committed to bringing you the best selection of top quality blinds, shades and window coverings at factory direct prices. We are confident that you will find the exact window treatment to fit not only your needs but your budget as well.
Factory Direct Blinds is looking forward to giving away up to 500 dollars in window coverings to one lucky winner.
Pinterest, the latest innovation in social media, acts as a visual pin board, allowing users to "pin" any photo from the Internet onto a "board" and share it with others.
To enter Factory Direct Blinds Holiday Window Display Contest all pinners need to do is,
Factory Direct Blinds is looking forward to getting into the holiday spirit by sharing our fellow pinners holiday window displays.
Don’t forget to check out Factory Direct Blinds brand new blog. Written by Madelynn and Brittany Marie, two best friends and amateur bloggers who share a love for blinds and all things beautiful!
Enter Holiday Contest
[gravityform id="1" name="Submit Your Entry" title="false" description="false"]]]>
https://www.factorydirectblinds.com/blogs/articles/the-best-part-of-back-to-school2024-05-30T06:46:23-07:002024-05-30T06:46:23-07:00The Best Part of Back to SchoolFactory Direct Blinds As summer break comes to an end, we finish up our last minute family vacations and prepare for the dreaded "Back to School" shopping. However, it isn't exactly what it used to be and is definitely not as dreaded as it once was. I believe that there are two major reasons that back to school shopping is something that parents can look forward to- as much as their kids do.
The first reason is the Internet. Every time I see a commercial for a store, they are also advertising their website or phone app! You can get everything that is offered at their physical location from the comfort of your own home, and often for a little (or a lot) less with offers such as "free shipping" and "Cyber Monday". Why wouldn’t you take advantage of the time saved and print out that handy checklist that you found on Pinterest to make your life a little easier and more organized?
The second reason (and I'll be honest, the BEST reason) is the excuse for you to shop all of the sales that have NOTHING to do with pens, paper and backpacks! In this rough economy, we know that every little bit helps and when we have the opportunity to, we like to help keep a couple extra dollars in our pockets. Now that the summer fun is over, and you have paid for that family vacation, you are able to splurge a little! You may choose to get some nice new Faux Wood or Basswood Blinds with a FREE privacy upgrade to replace the old Mini Blinds that are barely hanging on.
You may also consider getting a more modern looking Cellular Shade that you keep seeing on Pinterest. We are now offering them "Top Down/Bottom Up" at no cost to you-for a limited time only!!
If you want to splurge a little, without feeling guilty, I say go for it! After having your kids at home for almost three months non-stop (I'm sure you loved every second of it) you deserve a little ‘back to school shopping’ treat too.]]>


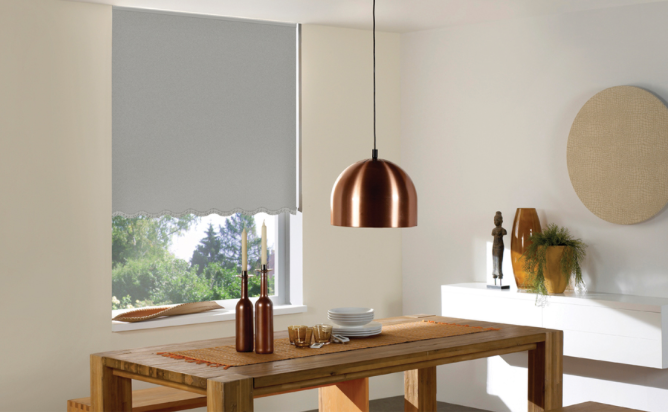


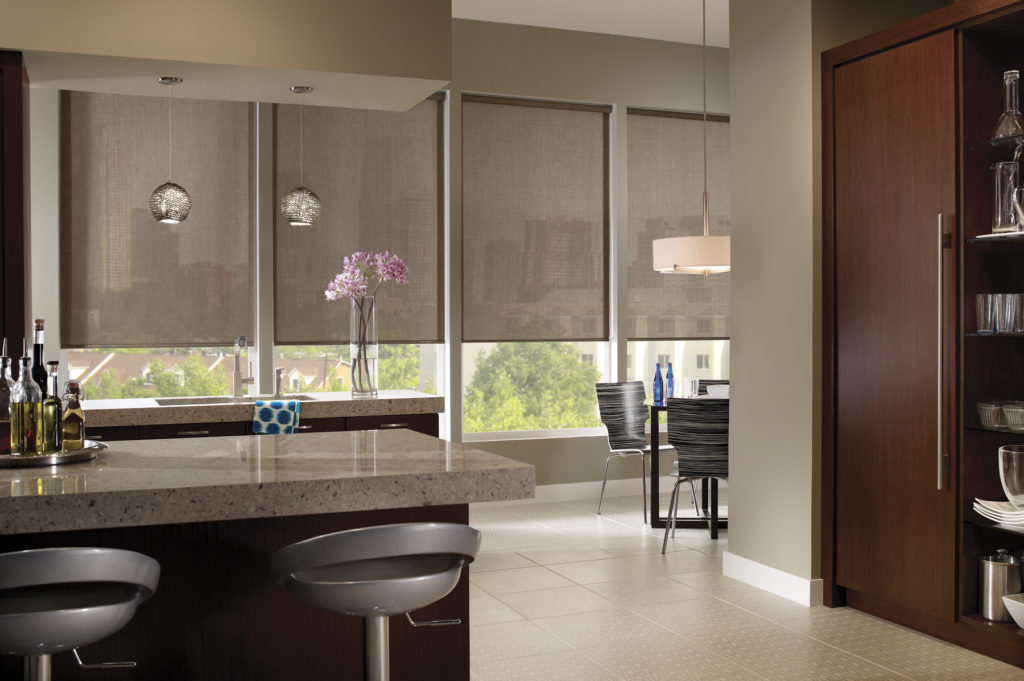
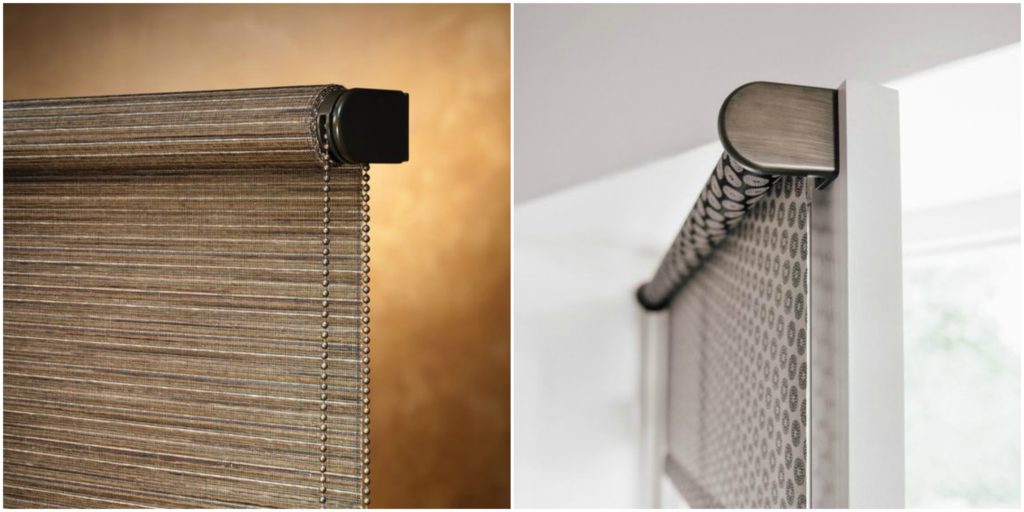
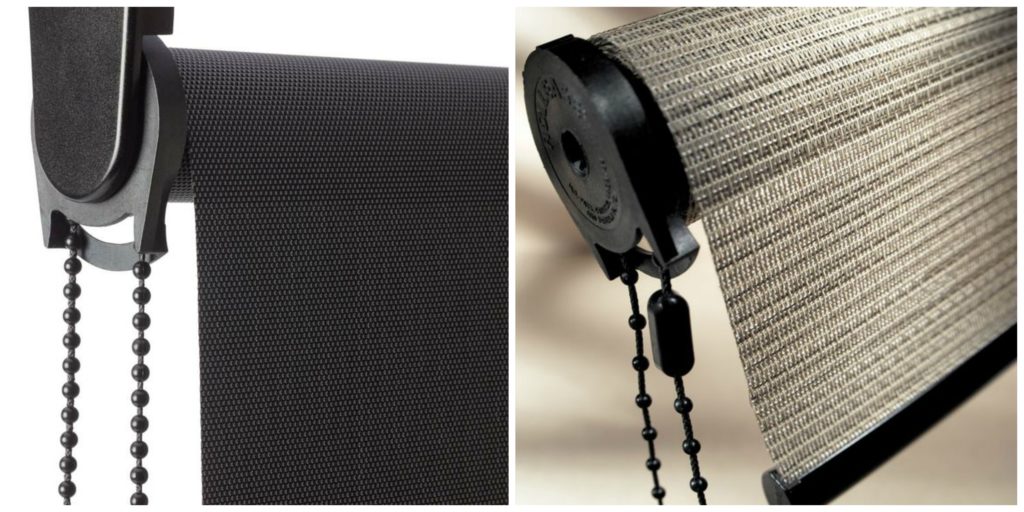
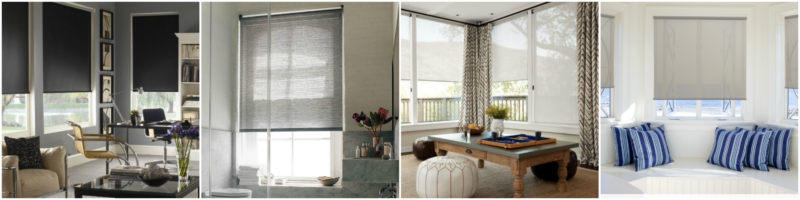


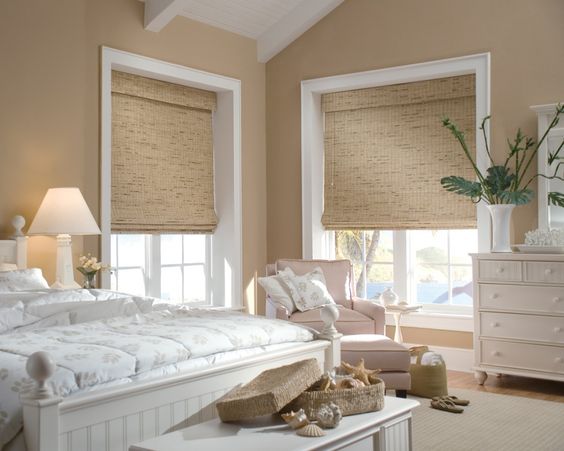

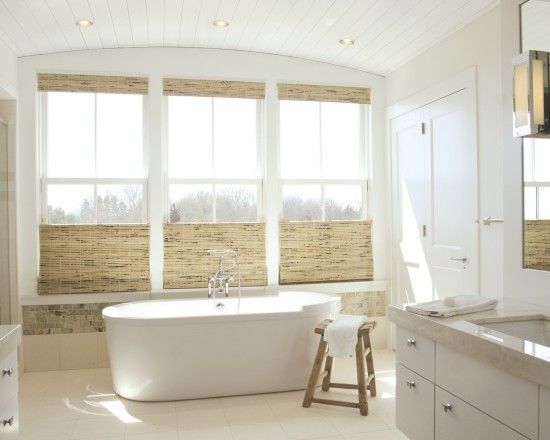
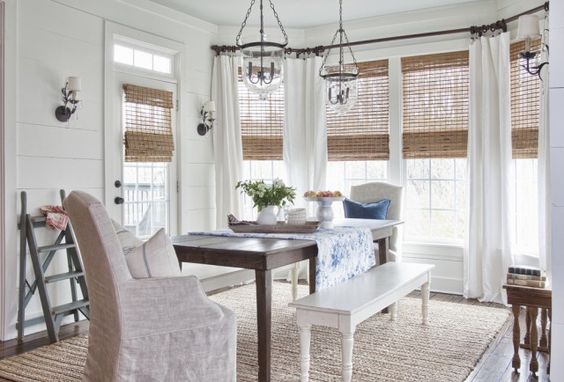

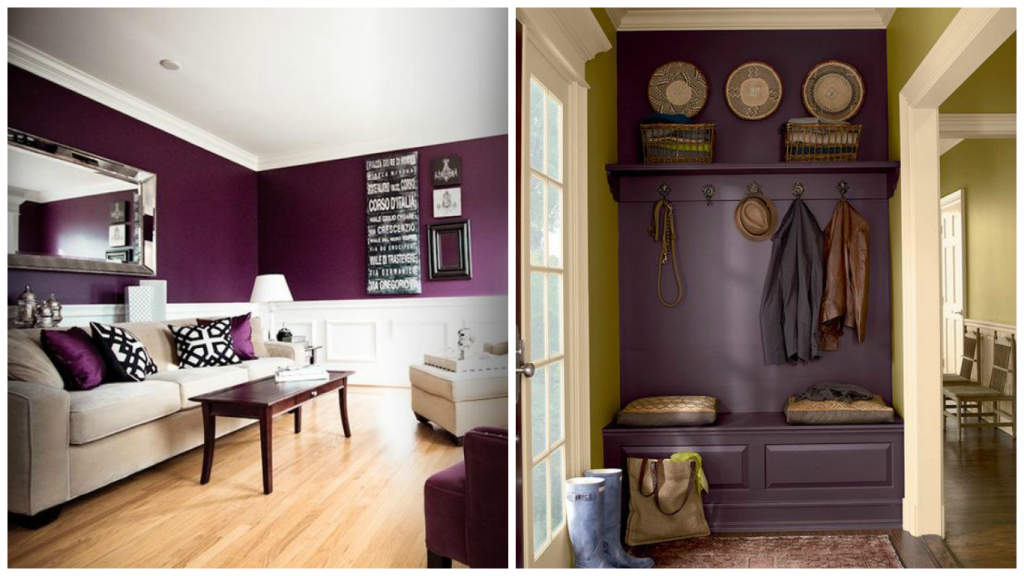
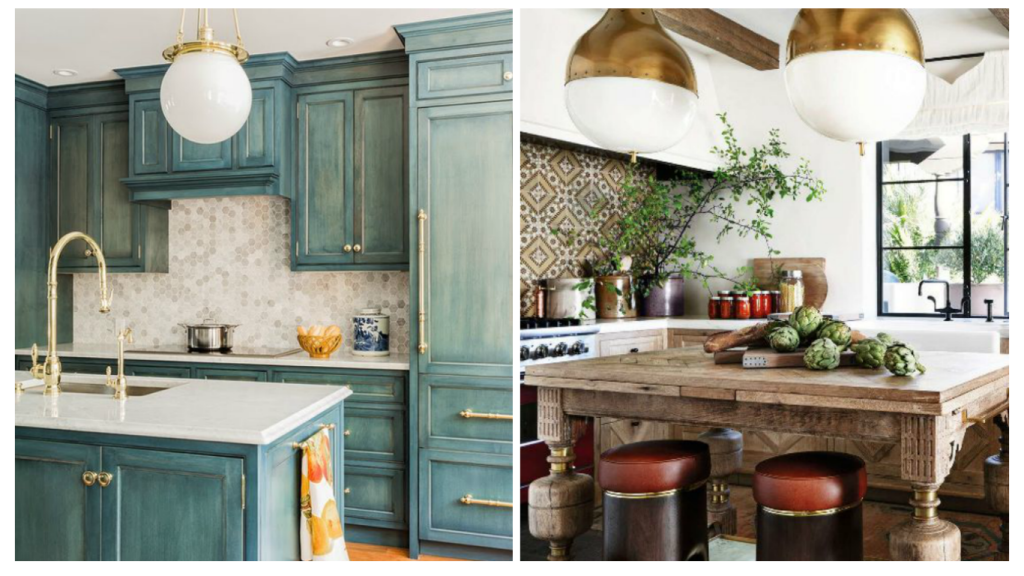
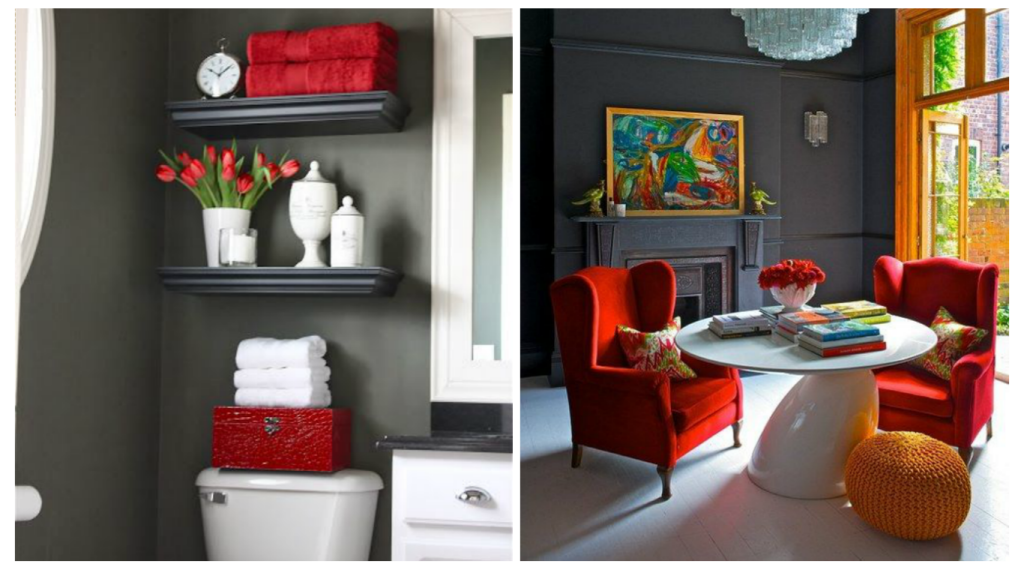
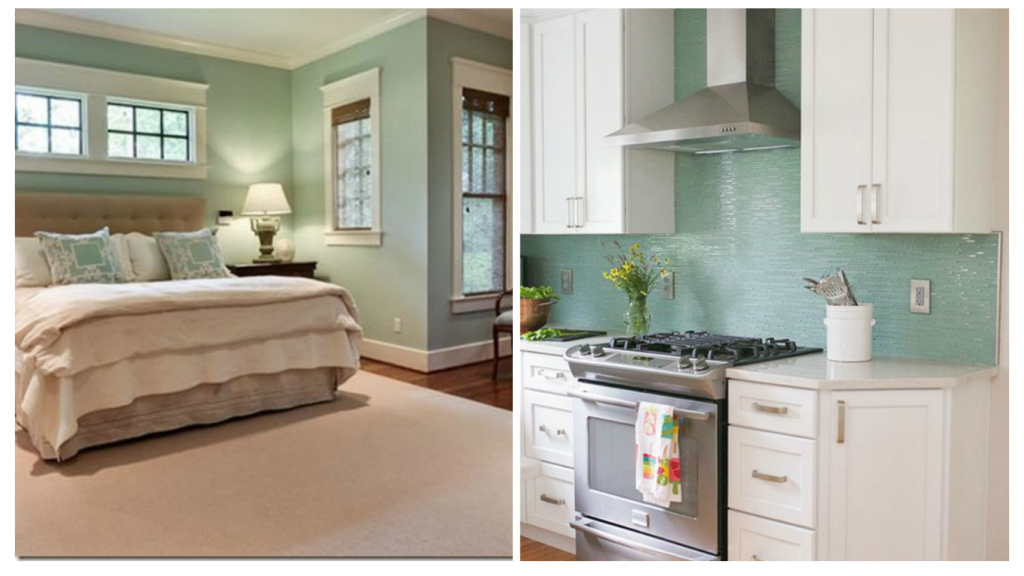


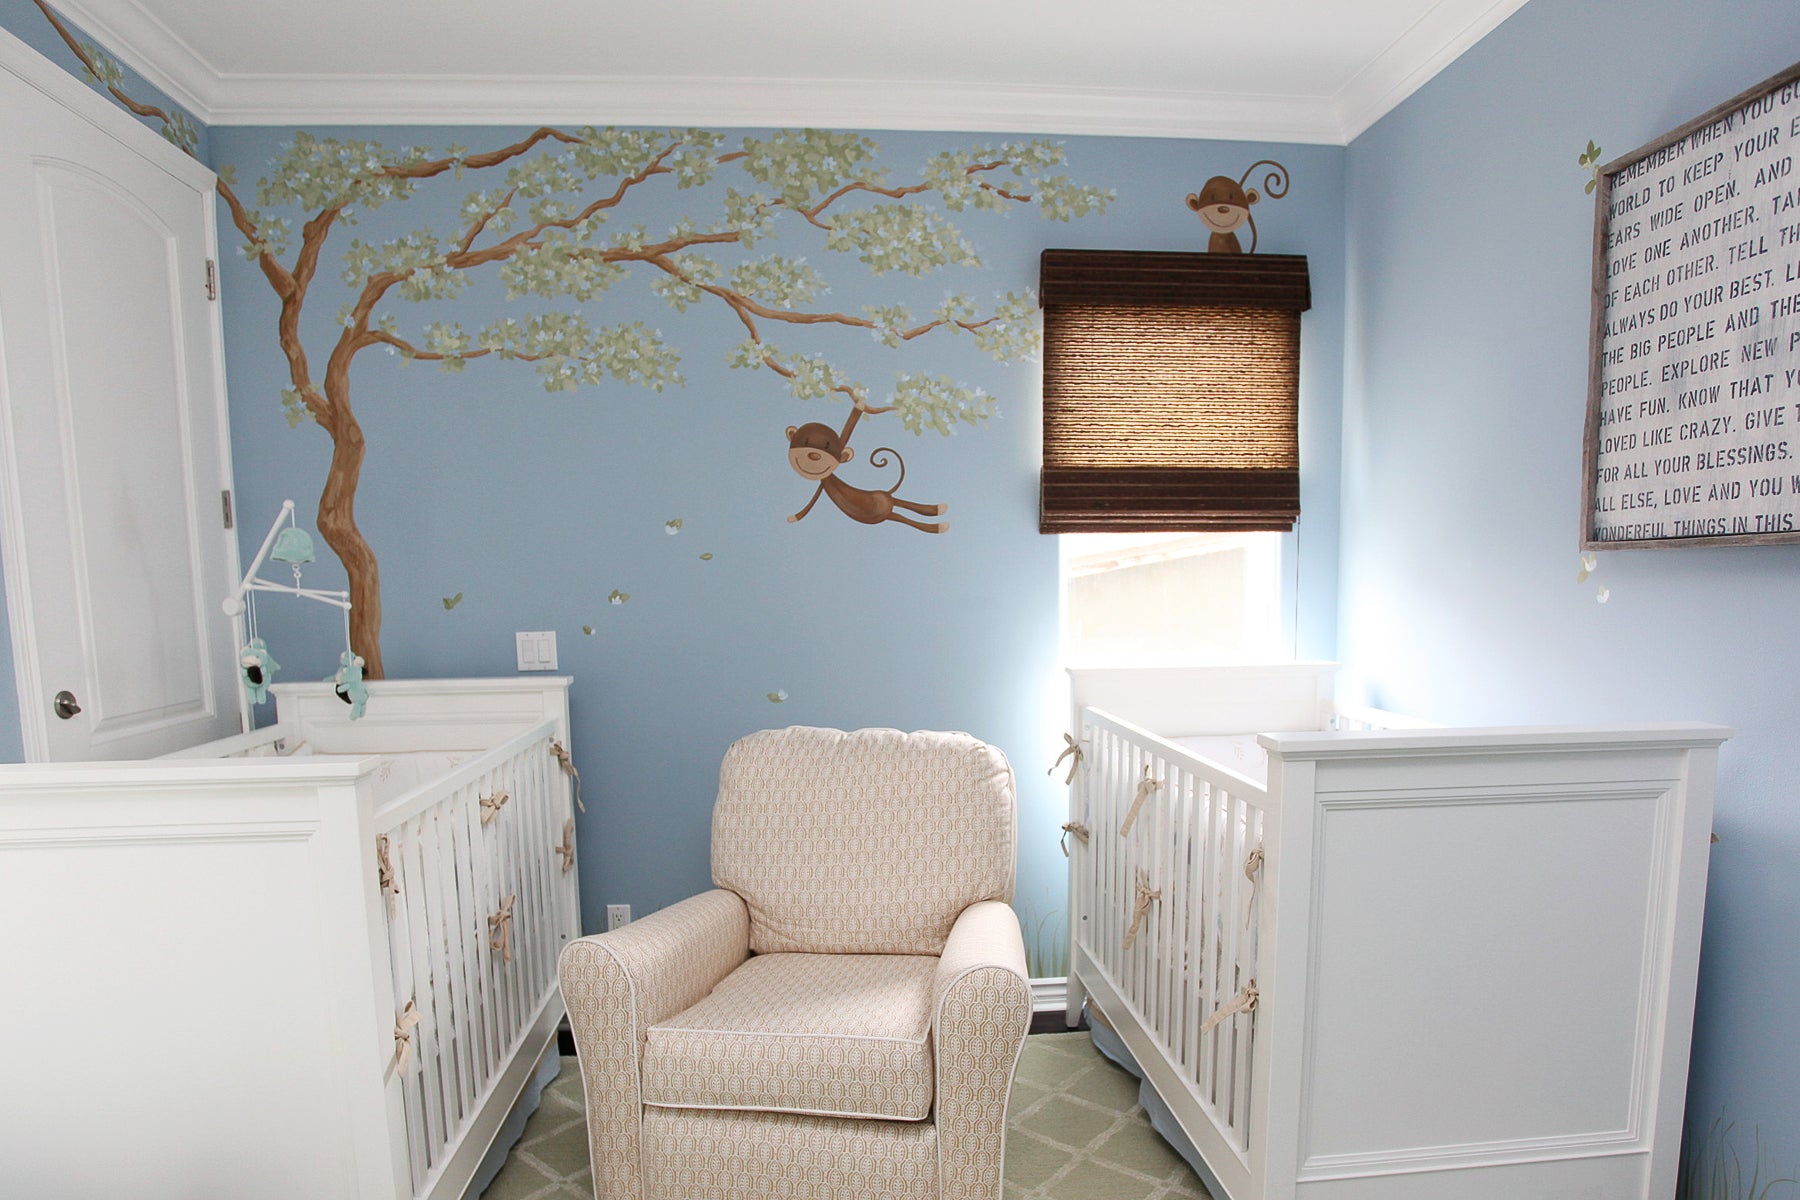

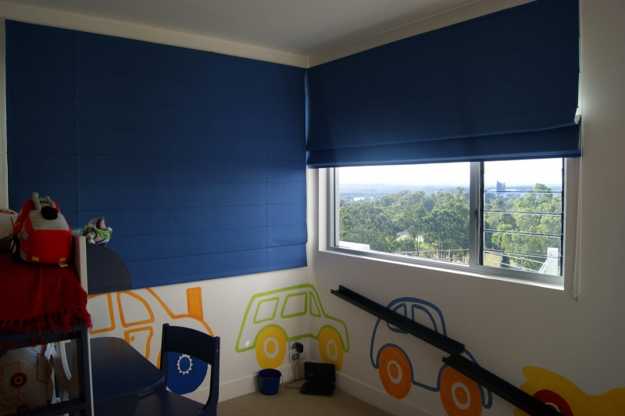


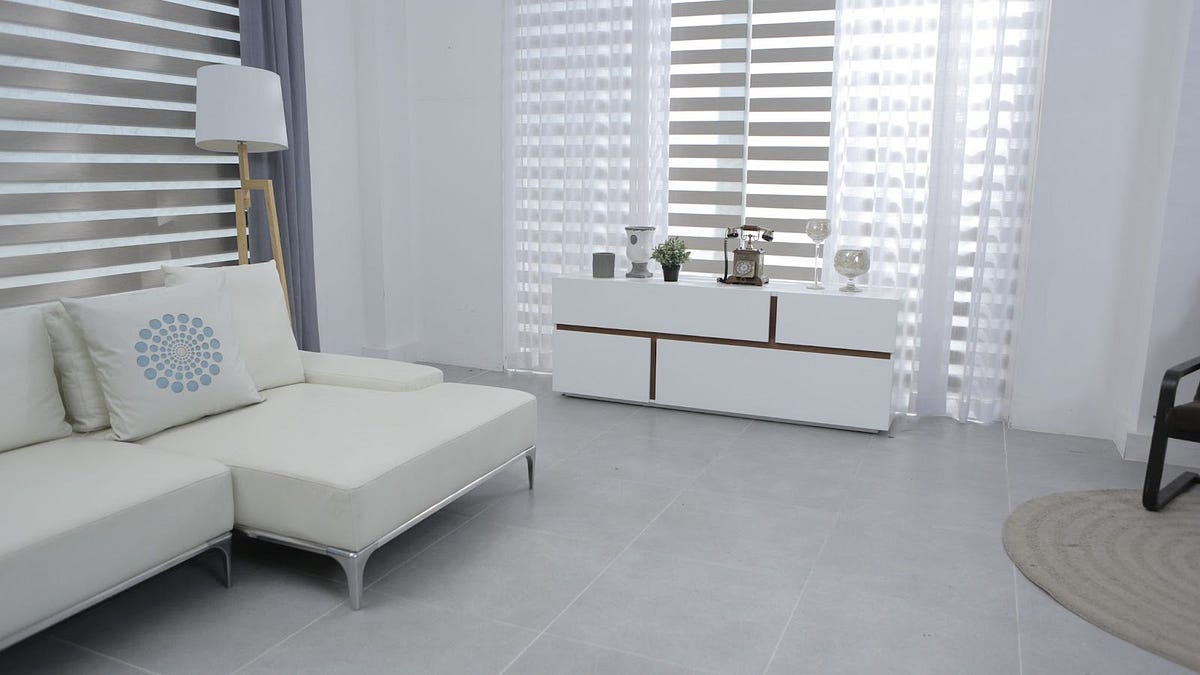
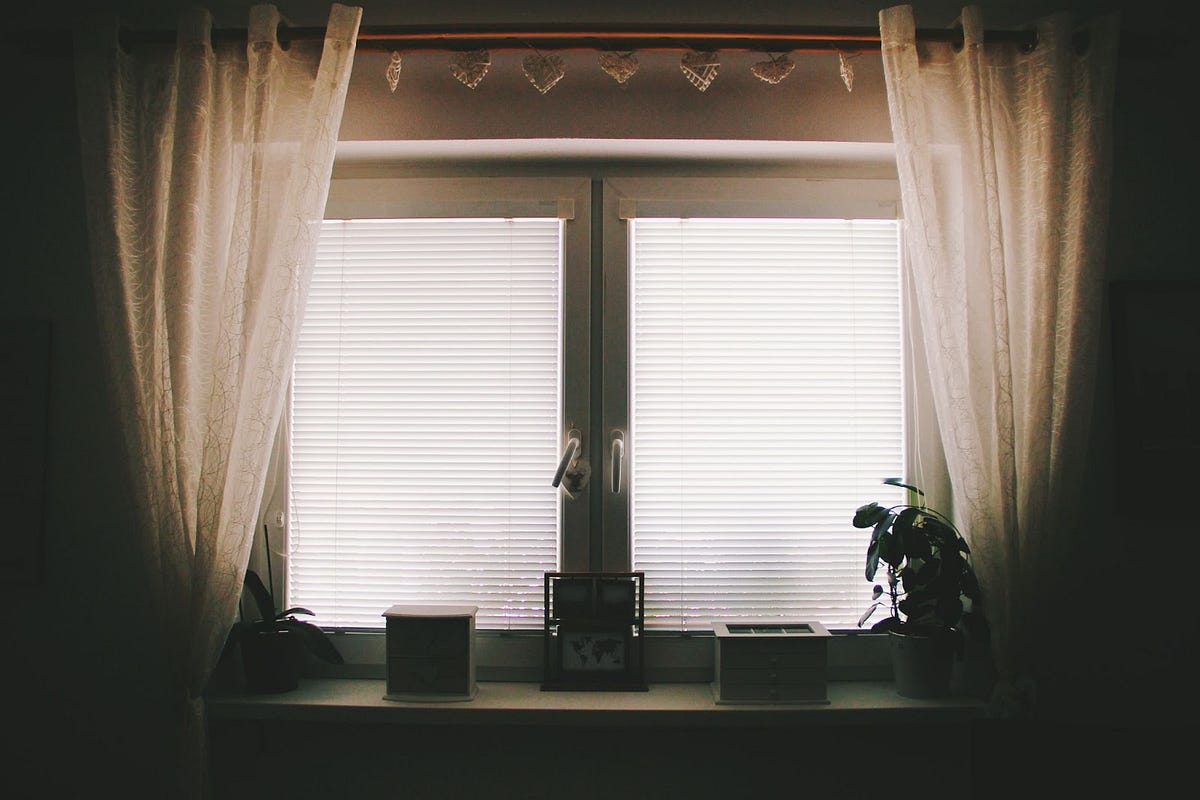
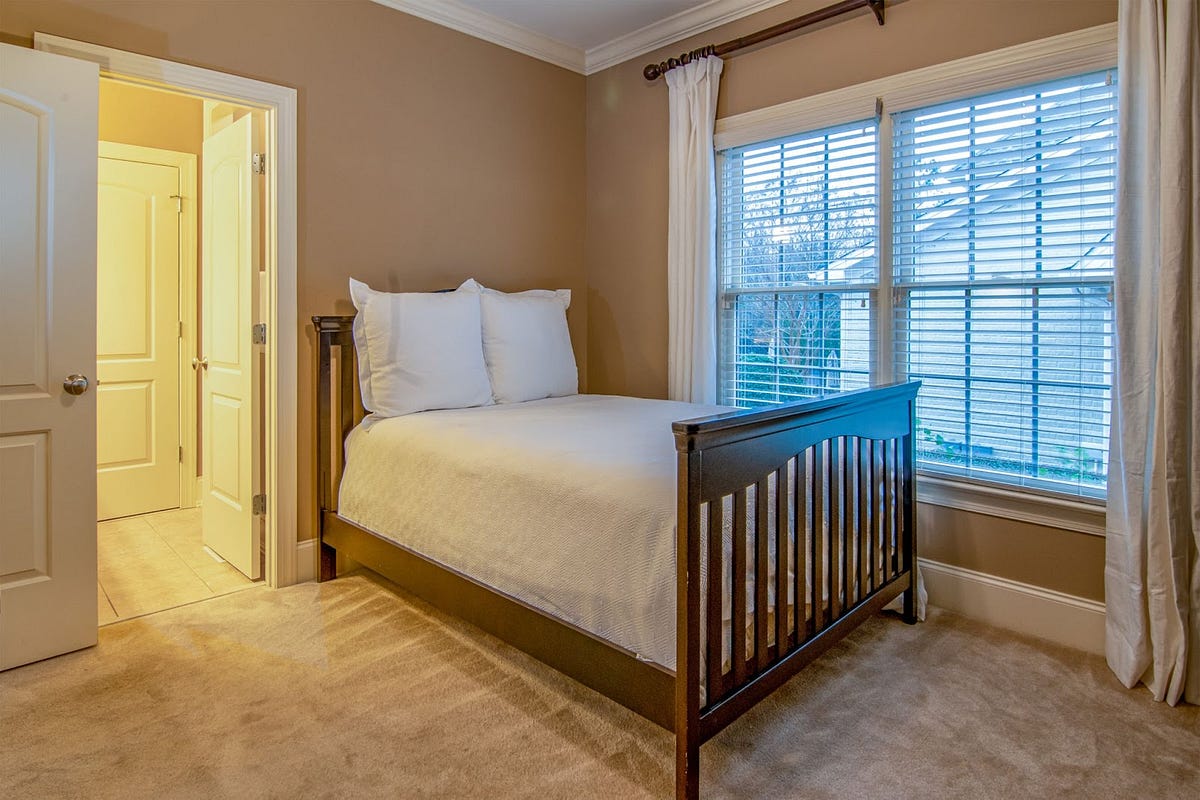


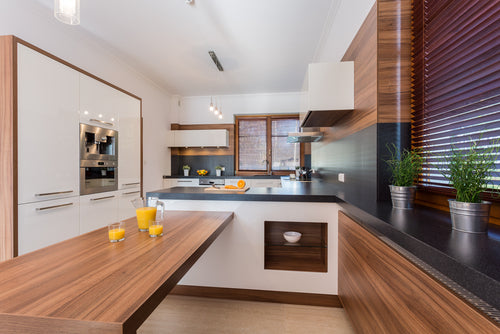
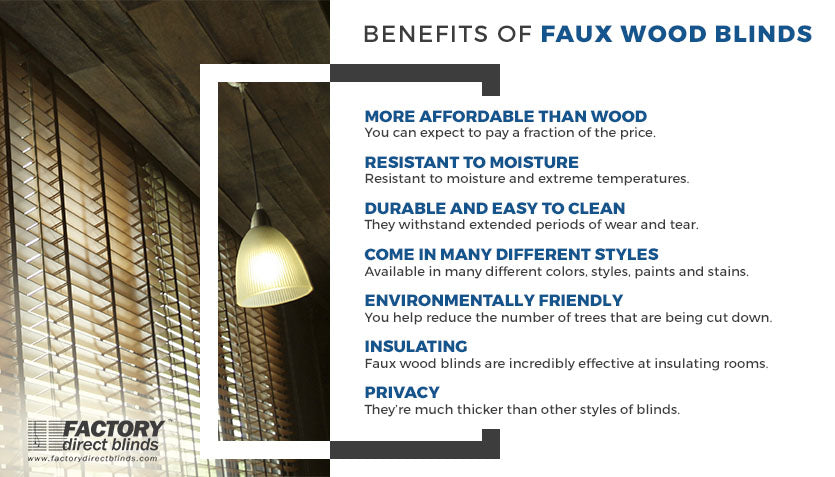

 When it comes to
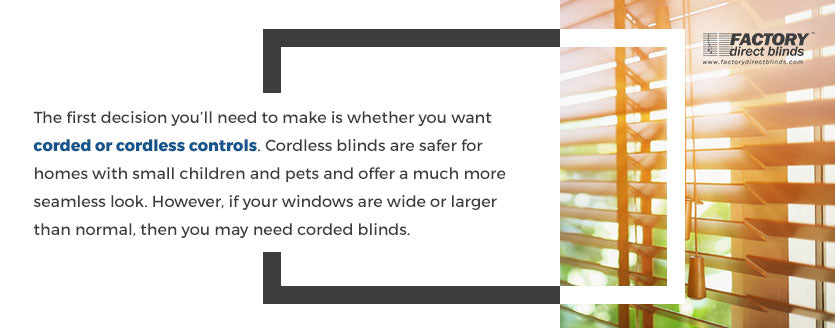

 Save money
 Do it on your own schedule
 Learn more about your blinds or shades
 Get it done exactly the way you want
 Gain confidence with DIY home improvement projects
 Bragging rights