Skip to content

The Installation Guide: How to Install Cordless Blinds


What Are the Advantages of Cordless Blinds?
Cordless blinds offer many different benefits. Safety is a huge factor: Corded blinds present a strangulation and choking hazard for children as well as pets. By eliminating the cord, cordless blinds remove this danger and make your home safer for children and pets.
Key Takeaways
- Cordless blinds eliminate dangling cords, reducing strangulation and choking hazards for children and pets.
- Cordless is a feature across many styles, including wood, woven, roller, roman, zebra, mini, pleated, and cellular.
- Zebra blinds use alternating opaque and translucent stripes for adjustable light control when aligned or offset.
- Cordless blinds can be impractical for very tall or obstructed windows and sometimes less durable than corded versions.
Cordless blinds also look more appealing and due to the lack of messy cords. In addition, they are easier to operate. Instead of hauling on the cord, you simply raise and lower the blinds using the bar at the bottom. With all these advantages, it’s no wonder that more and more homeowners are installing cordless blinds instead of corded models.
However, there are a few drawbacks that you need to consider when deciding between cordless and corded blinds. Cordless blinds are not the best choice for very tall windows, because you will not be able to reach the bottom of the blinds when they are fully retracted.
They are also not the best choice for windows where heavy furniture or another obstacle obstructs you from reaching the bottom of the blinds when they are fully extended. Corded blinds also typically last a bit longer than cordless blinds; however, the durability of blinds does depend on many other factors, including how well or poorly you treat the shades.

Order Cordless Mini Blinds That Are Affordable and Easy to Install
When to Choose Cordless Blinds
There are many situations where you might want to consider installing cordless blinds. Some of these include:
- If you have children or pets running around frequently.
- You need nursery window treatments for a playroom or child’s bedroom.
- You are tired of dealing with blind cords and want to get rid of them.
- You want window shades that are more convenient to operate than corded blinds.
On the flipside, there are some situations where cordless shades might not be the best option. These include:
- You cannot reach the bottom of the blinds when they are fully retracted due to the windows being too tall.
- You cannot reach the bottom of the blinds when they are fully extended due to furniture or another obstruction.
In these latter cases, corded blinds may be more appropriate.
Types of Cordless Blinds
Cordless is a feature, not a type of blind, and there are many different kinds of cordless shades that you can choose from. Here are the differents types of cordless blinds you can choose from:
Wood and Faux Wood Cordless Blinds
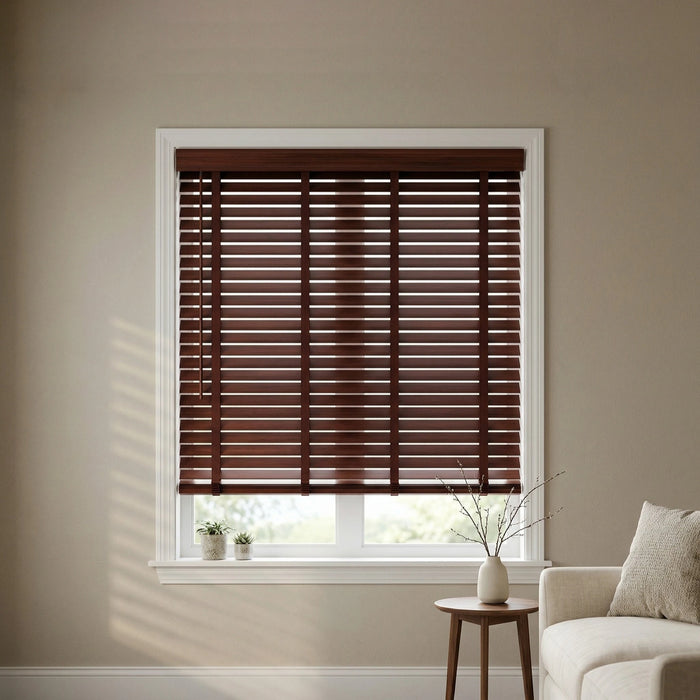
Genuine wood blinds are classy and go with any kind of decor, especially traditional. Wood blinds are one of the most popular types of blinds for homes, and you can’t go wrong with them. If you want the look of wood at a lower price point, you can also get faux blinds, which are made of a mix of wood fibers and PVC. Not only are faux wood blinds less expensive, but they’re also more durable and more moisture-resistant, making them perfect for bathrooms and basements.

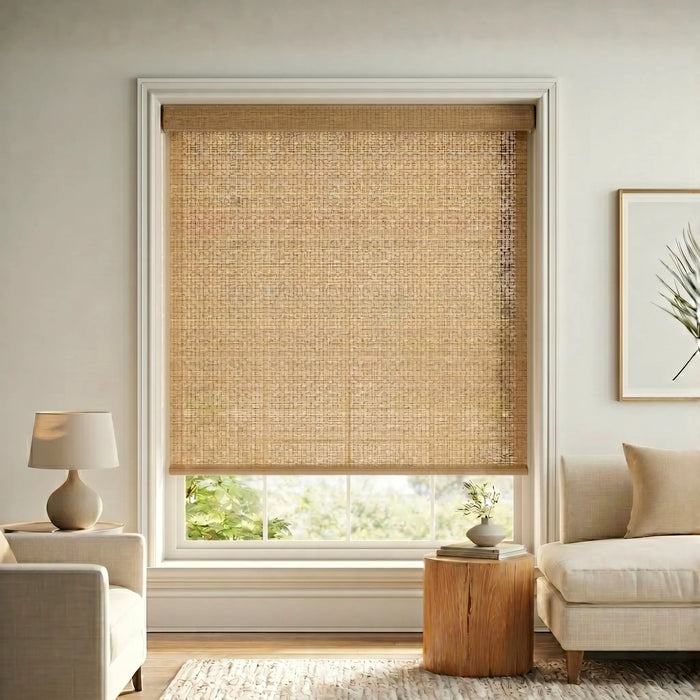
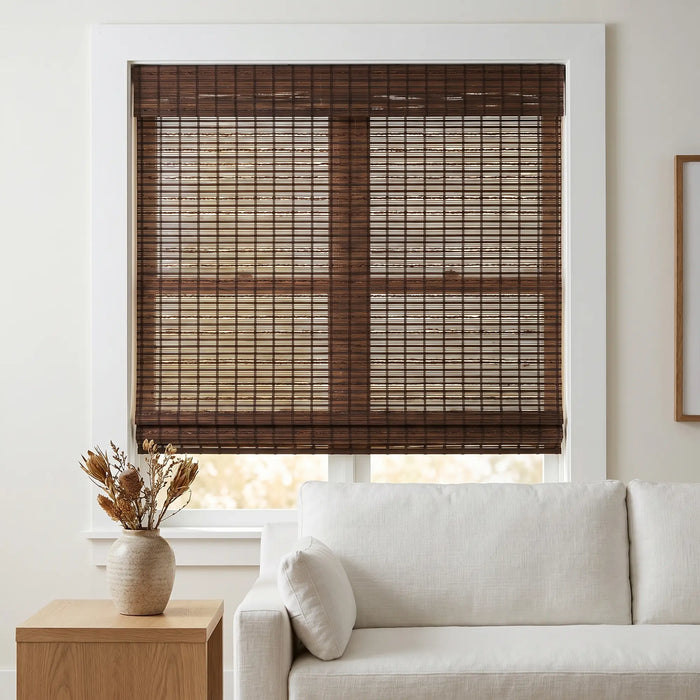
Cordless Woven Wooden Shades
Woven wooden shades are made from a mat of bamboo or other flexible fibers. The fibers are woven into a mat that can be rolled and unrolled to cover your windows. Woven wooden shades do let some light through, so if you want extra control or privacy, pair it with a blackout liner to block out light and any nosy neighbor’s eyes.
Cordless Roller Shades
Roller shades are made of vinyl or fabric and unroll into a single, smooth panel. Their sleek, no-fuss modern design goes well in contemporary and minimalist homes. Roller shades also make an excellent second layer underneath curtains or another type of window blind due to their low profile and minimalist appearance.
Cordless Roman Shades
Roman shades are also made of fabric, but unlike their sleeker cousin roller shades, Roman shades involve pleats and swags of fabric. This makes for a more dramatic window treatment that creates a fantastic focal point in living rooms and dining rooms. Roman shades combine the fabric swags of a curtain with the easy functionality of a window shade.

Cordless Zebra Blinds
Zebra blinds feature two layers of fabric made of alternating stripes of opaque and translucent fabric. Line up the translucent stripes to let in more light or offset them to block it out. Of course, zebra blinds can also be raised and lowered altogether like the other shades on this list. If you want the ultimate light control, then you should definitely check out zebra blinds.
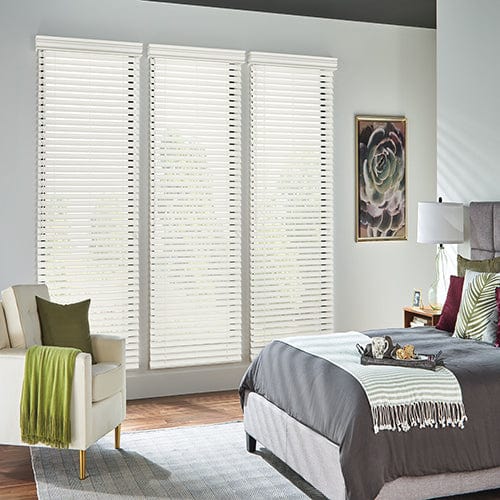
Cordless Mini Blinds
Mini blinds feature slats that are one inch in width or smaller, as opposed to the standard two-inch width; hence, the name mini blinds. Cordless mini blinds are made of durable materials such as PVC and aluminum and are very durable as a result. They are also very affordable, making them a great choice for rooms that get a lot of hard use, such as a garage or workroom.
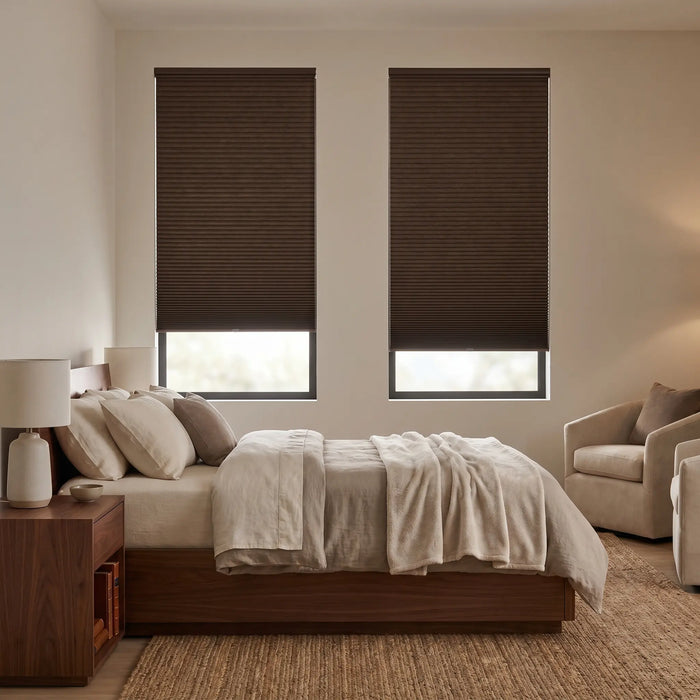
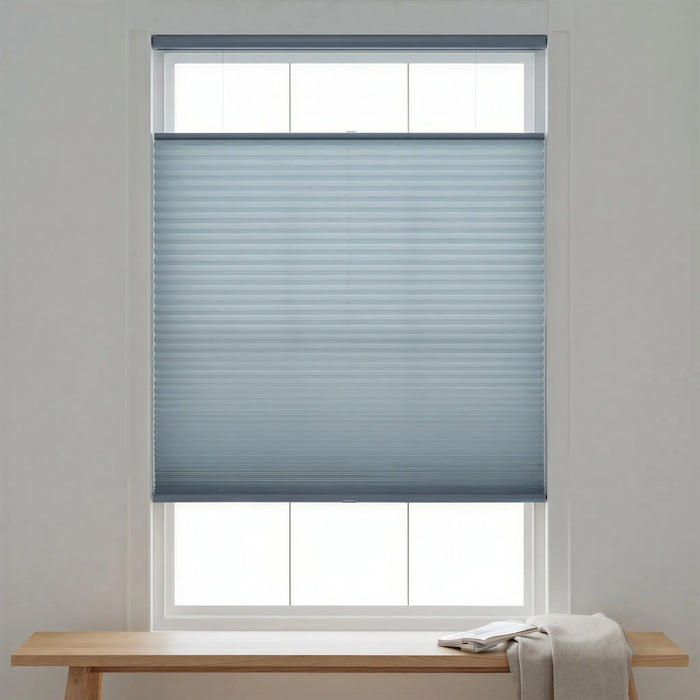
Cordless Pleated and Cellular Shades
Pleated shades are made of a single layer of fabric pressed into a zigzag pattern. The fabric may be somewhat translucent, giving you privacy while still allowing some light in. Cellular shades are also made from fabric, but they involve two layers crafted into a honeycomb pattern. Because of this, cellular shades offer insulting properties in addition to light control.
How to Install Cordless Blinds
In order to install your new blinds, you will need:
- Pencil
- Tape measure
- Leveler
- Power drill OR screwdriver, hammer, and nail
- Blinds and mounting hardware that came with it
- Stepladder
- Drywall anchors (necessary if you are not drilling into a stud)

First, lay out your blinds and hardware to ensure that you have all the pieces necessary to hang it up. Next, take the measurements and determine exactly where you will place the screws.
- If you are outside mounting your cordless shades, then you should position the headrail of the blinds on the trim or wall above the window. Move the headrail around until you are happy with the blind placement. Use a leveler to ensure that it is completely straight, and mark the edges of the headrail lightly with a pencil.
- If you are inside mounting your cordless shades, then you should position the headrail inside of the window frame. Make sure that the headrail is not so close to the window that the shades will hit it when fully extended; usually at least ¼ inch of clearance is necessary, and the manufacturer’s instructions may specify more. Use a leveler to ensure the front of the blinds is straight, and then lightly mark the edges with a pencil.
Line up the brackets with the pencil marks you made in the previous set and mark the screw holes for the brackets using the pencil. Do this for the brackets on each end of the headrail, and also for the center bracket if your blinds are wide enough to require one. Contrary to the name, center brackets must be placed slightly to one side to avoid interfering with the blind mechanisms, so keep that in mind.
Create pilot holes for the screws using a 3/32” drill bit, or a ¼” drill bit if you plan to use wall anchors. If you do not have a power drill, then create pilot holes manually by tapping a nail partway into the wall with a hammer and then pulling it out. Make sure to choose a nail that has a diameter similar to the drill bits listed here.
Line up the first bracket with the pilot holes created in the previous step. Using your power drill or your screwdriver, attach the bracket to the using screws. Repeat this for the bracket on the other side and the center bracket as necessary. Test that the brackets are securely fastened to the wall and that everything lines up correctly.
Now it’s time to insert the headrail into the brackets. These instructions are slightly different, depending on the type of roller shade you have chosen. If your blinds came with a valance, you might want to attach the valance clips before installing the headrail to ensure they are in correct positions and won’t interfere with the operation of the blinds.

- For wood and faux wood blinds, slide the headrail into the brackets. Fold down the front tabs until they click into place securely.
- For mini blinds, lift the head rail into position so the front edge of each bracket is under the inner front edge of the head rail. Push the head rail upward until the flexible tab at the bottom of each bracket snaps onto the back of the head rail.
- For woven wooden shades, lift the headrail and place the pin on each end of the blinds into the holes in the brackets. Attach a washer and a wingnut to each post and tighten them until secure.
- For zebra shades, slide the inner rear of the head rail onto the metal tabs at the back of each bracket. Push up so that the brackets snap onto the headrail. To lock the brackets into place, pull the plastic tab on the front of each bracket outward toward the front of the shade. For inside shade mounts, use pliers to accomplish this if you cannot reach the tabs.
- For Roman and roller shades, put the spring-loaded pin into the round hole of the bracket and push the spring-loaded tip into the bracket. On the opposite side, insert the hook arms into the two hook arm receiver holes of the bracket. Once the two hook arms are inserted, gently pull down on the headrail until the two hook arms have locked securely to the bracket.
- For cellular shades, insert the front ridge of the bracket into the groove on the front of the headrail. You will have to hold the headrail at an angle initially. Tilt the shade back toward the window glass until it locks into place.
- For pleated fabric shades, lift the head rail into position so that the inner front edge of the head rail slides into the slot at the front of each bracket. Push the head rail upward until the flexible tab at the bottom of each bracket snaps onto the back of the head rail.
Nursery Window Treatments Protect Your Baby from Dangerous Cords
In all cases, check that the brackets are securely fastened before attempting to test the blind. Insert the valance pieces into the clips, and you’re all ready to enjoy your new blinds.
To operate cordless blinds, gently grasp the bottom rail and raise and lower it to your desired height. When you have adjusted your blinds to your preferences, simply release the bottom rail and the shades will stay in place.

Get your cordless shades at Factory Direct Blinds, and we’ll ship them straight to your home for the ultimate convenience. Installing your own blinds is relatively simple, and you can save yourself a lot of money by doing it yourself — money that you can then spend on getting the best window treatments for your home.
If you’re not certain which cordless blinds will look best in your home, then take advantage of our free sample program and get samples sent straight to you so you can see what the materials look like in your own home. We also have an entire research center full of helpful articles that explain everything you need to know about window shades, including how to clean blinds.
Image Credits
Maridav/shutterstock.com
Africa Studio/shutterstock.com
IB Photography/shutterstock.com
Gresei/shutterstock.com
Audrius Merfeldas/shutterstock.com
Masarik/shutterstock.com
Peter Sobolev/shutterstock.com
Pupes/shutterstock.com
NsdPower/shutterstock.com
Kateryna Kubitsa/shutterstock.com
Maridav/shutterstock.com
ALPA PROD/shutterstock.com