Skip to content

Venetian Blind Repair: Easy Steps to Fix It Yourself


Let's talk about a timeless window treatment that has been gracing homes for ages: Venetian blinds. In this modern era of ever-changing window treatment trends, there's something undeniably charming and versatile about these classic blinds.
Key Takeaways
- Tilt and lift mechanisms use slat holes, a tilt tube, and cord locks for light and height control.
- Common issues include broken or bent slats, jammed or frayed cords, and sagging from weakened supports.
- Typical DIY repairs involve replacing or straightening slats, splicing cords by melting ends, and reattaching ladder tape.
- Regular dusting, occasional deep cleaning, gentle handling, and cord inspections extend lifespan and prevent damage.
Not only do Venetian blinds offer unrivalled privacy and light control, but they also have a unique ability to blend seamlessly into any home aesthetic and serve practical functions.
However, like any long-standing household item, Venetian blinds can face their fair share of challenges over time. Whether it's a broken slat, tangled cords, or simply a need for regular maintenance, homeowners often find themselves grappling with these issues.
That's where this guide comes in - to empower you with the knowledge and skills to tackle these repairs and maintenance tasks on your own, saving you both time and money.
So, let's dive in and learn how to keep your Venetian blinds looking great, functioning smoothly, and adding that touch of timeless elegance to your home!
IN THIS ARTICLE
- Understanding Venetian Blinds
- Common Problems and Their Causes
- Preparing for Repair
- Step-by-Step Repair Guide
- Maintenance Tips for Venetian Blinds
- When to Seek Professional Help
- Empowering Yourself: The Rewards of DIY Repair
- FAQs
Understanding Venetian Blinds
Venetian blinds are arguably the most popular blinds for windows. You might think that their name suggests they originated in the beautiful city of Venice, but that's actually not the case.
The most widely accepted theory is that Venetian blinds made their debut in the Middle East, specifically in Persia. However, the exact year and the brilliant mind behind their invention remain unknown.
Legend has it that a Venetian merchant travelling in Persia stumbled upon window blinds in Persian homes and brought them back to Venice. Once in Venice, these blinds started gaining popularity, and that's how they came to be known as Venetian blinds.
Fast forward to 1769, when an English merchant and inventor named Edward Bevan patented Venetian blinds. His innovative design caught the attention of many, and that's when Venetian blinds began to evolve into what we see today.
So, why are Venetian blinds so beloved? These are some of their benefits:
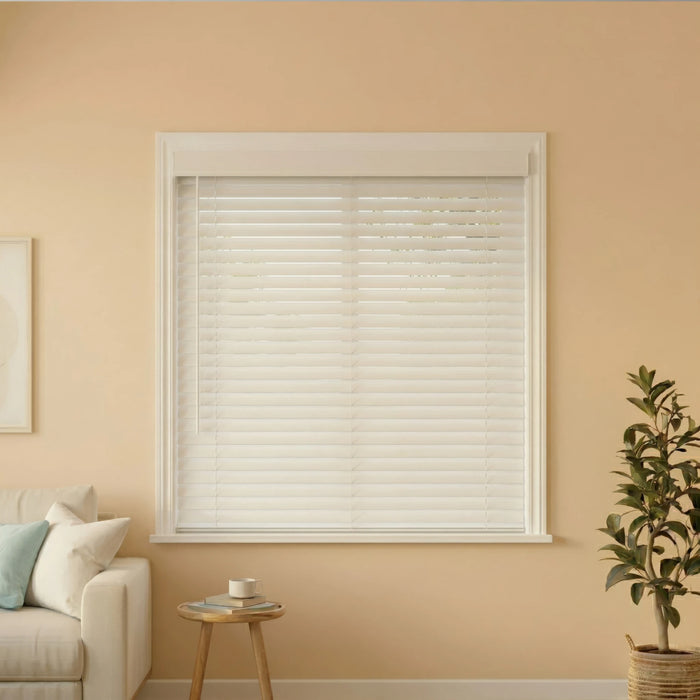
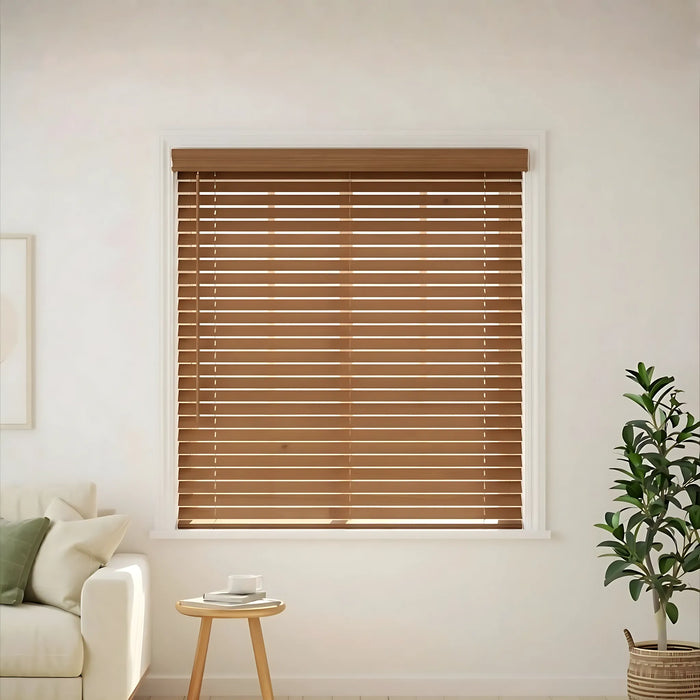
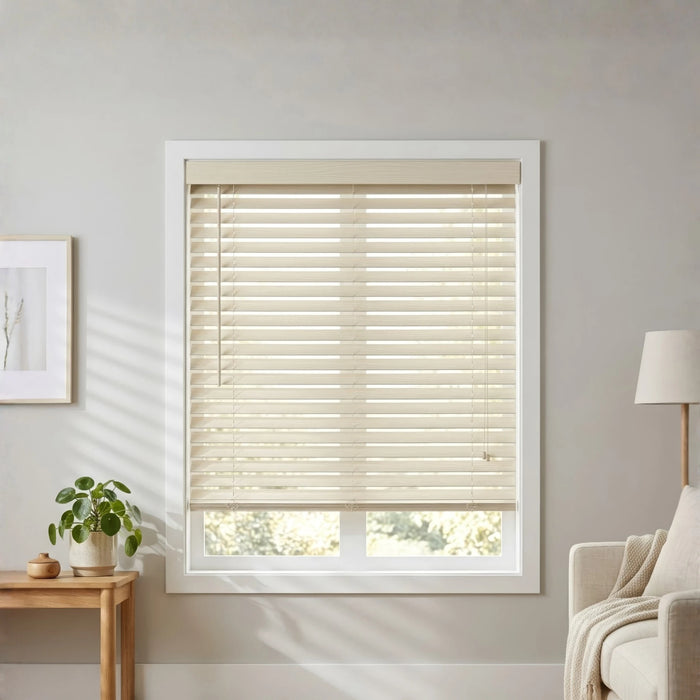
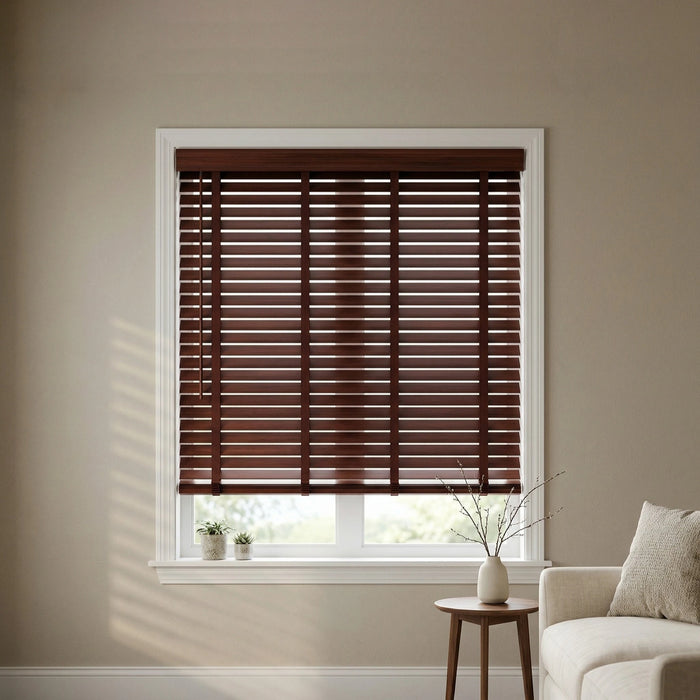
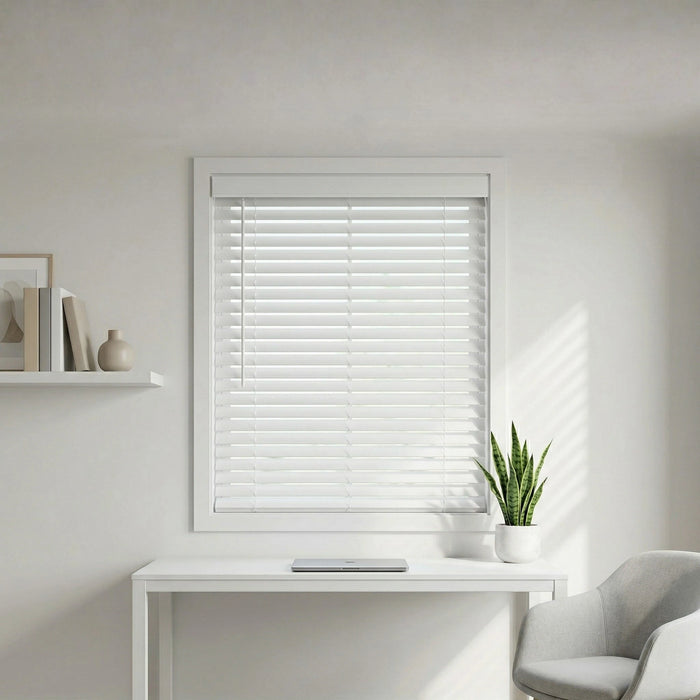
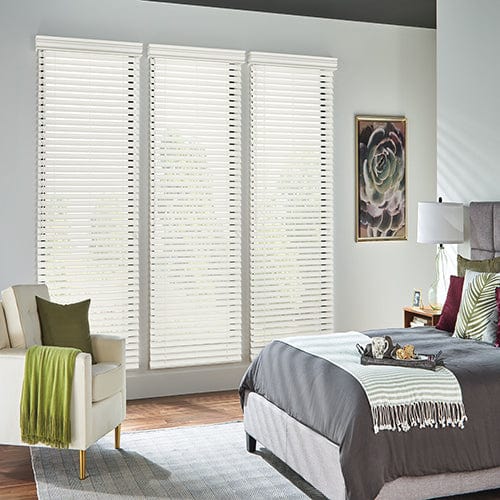
- Versatility: Venetian blinds come in various materials, such as wood, aluminum, or faux wood, colours, and finishes, making them versatile enough to complement any interior design style.
- Light Control: The adjustable slats of Venetian blinds allow you to regulate the amount of light entering your space, giving you control over brightness and glare.
- Privacy: By adjusting the angle of the slats, you can strike the perfect balance between enjoying natural light and ensuring privacy from prying eyes.
- Easy Maintenance: Venetian blinds are relatively easy to clean and maintain, requiring a simple wipe-down or dusting to keep them looking fresh.
- Energy Efficiency: By adjusting the slats, you can optimize natural light and regulate heat gain or loss, potentially reducing energy consumption and costs.
- Timelessness: Venetian blinds have stood the test of time and remain a classic choice for window treatments, adding a timeless touch to any space.
With their unparalleled benefits, Venetian blinds continue to be an all-time favourite for homeowners around the world.

Source: Workshopshed
Components of Venetian Blinds
Let's dive into the components that make up Venetian blinds. A Venetian blind is composed of various parts, but there are a few main components.
Understanding these parts will give you a better grasp of how they work and how to handle them if any adjustments or repairs are needed.
- Headrail: The top part of the blinds that holds everything together and contains important mechanisms.
- Bottom Rail: The horizontal bar at the bottom of the blinds that anchors them and provides stability.
- Tilt Tube: A cylindrical component in the headrail that controls the tilting of the slats.
- Tape Ladder: A fabric or string ladder holds the slats in place and allows them to move together.
- Tilt Cord: The cord or string that connects to the tilt mechanism and controls the angle of the slats.
- Lift Cord: The cord used to raise and lower the blinds, allowing you to adjust their height.
When it comes to removing any part of the blinds, it's often more efficient to bring down the entire assembly, including the slats, ladder tape, tilt tube, and blind cords.
While it may seem counterproductive at first, this method can save you time and ensure that everything is reassembled correctly. Plus, it gives you an opportunity to clean and inspect all the components thoroughly.
Remember, if you're unsure about handling any specific component or making adjustments, it's always a good idea to refer to the manufacturer's instructions or seek professional assistance.
How Venetian Blinds Work
Venetian blinds have a clever mechanism that allows you to adjust both the lifting and tilting of the slats, giving you control over light, privacy, and the overall ambiance of your space.
The operational mechanics of Venetian blinds begin with the tiny holes punched into each slat. These holes serve as pathways for the cords to run from the headrail to the bottom rail, connecting all the components together.
Starting with the tilting mechanism, there is the top tilt mechanism located on the headrail. It allows you to rotate the Venetian slats either clockwise or counterclockwise to achieve the desired angle. To adjust the slats, you simply twist the tilt wand in the desired direction.
Twisting the slats upwards provides complete privacy as they close tightly and block outside views. On the other hand, twisting them downwards allows the maximum amount of light to enter the room.
Now let's discuss the lifting mechanism. The cords that run through the slats also connect to the cord lock mechanisms, which are hidden in the headrail of the blinds. This cord lock mechanism acts as a breakaway mechanism and holds the slats in place when you raise or lower the blinds. It gives you complete command over where the blind stops, allowing for a full range of light control.
To lower the blind, you simply hold the lift cord diagonally across the blind and gently release the cord. This releases the cord lock and allows the blind to descend gradually.
The combination of the tilting and lifting mechanisms gives you the ability to customize the position and orientation of the slats to your liking, achieving the perfect balance of light, privacy, and aesthetics.
Venetian blinds are designed to be easy and practical to operate, making them a reliable and stylish option for any window. With the simple twist of the tilt wand and the smooth release of the lift cord, you have full control over the functionality of your blinds, allowing you to create the ideal atmosphere in your space.
Common Problems and Their Causes
Like any blinds, shades, and shutters, Venetian blinds can sometimes encounter a few common problems. Let's explore these issues, their potential causes, and some signs to look out for:
- Broken or Bent Slats: One common problem is when slats become broken or bent out of shape. This can happen due to accidental impact, rough handling, or even prolonged exposure to direct sunlight. For example, if you accidentally bump into the blinds while moving furniture, it can cause slats to break or bend. Signs to look out for include slats that are visibly damaged or no longer aligned with the rest of the blinds.
- Jammed or Frayed Cords: Cords that are jammed or frayed can make it difficult to operate the blinds smoothly. This issue can arise from excessive pulling or tugging on the cords, over time causing them to become tangled or worn. If the lift cord gets caught on an object while raising or lowering the blinds, it may result in fraying or jamming. Signs of this problem include cords that are difficult to pull or cords that appear frayed or tangled.
- Sagging: A common issue that can occur with larger Venetian blinds, sagging occurs especially if blinds are made of heavier materials like wood. Over time, the weight of the slats can cause the blinds to sag in the middle. This can happen due to inadequate support, excessive humidity, or the natural aging of the blinds. Picture a scenario where you have wooden Venetian blinds in a bathroom with high humidity levels. Over the years, moisture can affect the integrity of the wood, leading to sagging and warping.
To identify the exact problem with your blinds, it's essential to observe the behaviour and condition of the blinds closely. Look for any visible damage, irregular movements, or unusual resistance while operating them.
Additionally, check the cords, slats, and tilt mechanism for any signs of wear, fraying, or misalignment. In some cases, simple maintenance tasks like cleaning the blinds or adjusting the tension in the cords can resolve minor issues.
Remember, taking care of your Venetian blinds and addressing issues promptly can help prolong their lifespan and ensure they continue to function effectively.
Preparing for Repair
When it comes to repairing Venetian blinds, safety should always be a top priority. Before you start any repairs, it's important to take certain precautions to ensure your well-being and the smooth progress of the task at hand.
Let's go over some safety measures and preparations you should keep in mind:
- Power Source: If your Venetian blinds are motorized or connected to a power source, make sure to unplug them before beginning any repairs. This will prevent any accidental movement or electrical hazards while you work on the blinds.
- Child Safety: If you have small children around, it's crucial to keep all small parts, tools, and cords out of their reach. Children can accidentally swallow or choke on small objects, so it's best to keep them in a secure location away from their curiosity.
- Tools and Materials: Gather the necessary tools and materials for the repair. This may include a screwdriver (typically a flat-head or Phillips head), replacement slats or cords (if needed), scissors or wire cutters (for cord adjustments), and any other specific components recommended by the manufacturer. If you don't have these items readily available in your home toolkit, they can be purchased at hardware stores or online.
- Workspace Preparation: Set up a conducive workspace for the repair. Ensure that you have good lighting to clearly see the components and make precise adjustments. Also, make sure you have enough space to spread out the blinds and work comfortably. Having all the necessary tools within reach will help you stay organized and save time during the repair process.
- Protective Gear: Consider wearing appropriate protective gear, such as safety goggles or gloves, especially if you're dealing with sharp or delicate parts. This will help prevent any injuries while handling the blinds or tools.
By prioritizing safety and creating a well-prepared workspace, you can approach Venetian blind repairs with confidence and efficiency. Taking these precautions will not only protect your well-being but also contribute to a successful and hassle-free repair experience.
BROWSE OUR COLLECTION OF FAUX WOOD BLINDS
Step-by-Step Repair Guide
The time has come to roll up your sleeves and embark on a Venetian blind repair mission now that you know what to expect.
Whether you're dealing with broken or bent slats, jammed or frayed cords, or the pesky issue of sagging, our guide will walk you through each repair process in a clear and concise manner.
No need to panic or feel overwhelmed - our step-by-step instructions will make the whole repair process a breeze.
So, gather your tools and get ready to give your blinds a well-deserved makeover. With our repair guide, you'll be able to tackle those issues like a pro, saving you time and money on professional repairs or replacements.
Repairing Broken or Bent Slats
Has a mishap left your Venetian blinds with broken or bent slats? Don't worry, you don't necessarily have to replace the entire set. With a few simple steps, you can bring those slats back to their original form and get your blinds looking as good as new.
Before we begin, here's a handy tip: If you're working with bent slats, start by pinching the blinds up so they can sit level. This will make it easier to work on straightening them out. Now, let's get into the step-by-step instructions:
Step 1: Identify the broken or bent slats: Carefully inspect your blinds and locate the specific slats that are broken or bent. It's important to identify the ones that need attention before proceeding with the repair.
Step 2: Straightening bent slats: For slats that are bent at the ends or have small kinks, use your fingers to gently apply pressure and give them a little pinch. This will help straighten out the blades. Start at one end and glide your fingers along the length of the slat. Repeat this process for any remaining bends or kinks.
Step 3: Addressing bends in the middle: If you have slats with bends in the middle, the pinching technique can be just as effective. Place one finger on the bottom of the bend and another finger on the top. Glide your fingers across the bend, applying gentle pressure to straighten it out. Move your fingers along the entire length of the slat until it's back in shape.
Step 4: Recheck and adjust: After straightening the slats, take a moment to recheck each one to ensure they are properly aligned and free from any remaining bends or kinks. Make any necessary adjustments by repeating the previous steps as needed.
As you repair bent Venetian blind slats, here are some precautions:
- Be gentle when applying pressure to the slats to avoid causing further damage.
- If a slat is severely bent or broken beyond repair, it may be best to replace that individual slat. You can typically purchase replacement slats from blind manufacturers or home improvement stores.
- Remember to clean your blinds after the repair process to remove any dirt or dust that may have accumulated during the repair.
By following these simple steps, you can restore the integrity and appearance of your blinds by repairing broken or bent slats. With a little bit of patience and precision, your blinds will be looking their best in no time.
Fixing Jammed or Frayed Cords
With a few tools and a little bit of know-how, you can fix jammed or frayed cords and restore the smooth operation of your blinds.
So gather your tools - a cigarette lighter, a pair of scissors, and a 1.4 mm cord - and let's get started. Here are the steps to do so:
Step 1: Cut the bottom of the broken cord: Identify the section of the cord that is broken or frayed and use a pair of scissors to carefully cut the cord at the bottom. Be cautious while cutting to avoid any damage to the surrounding components.
Step 2: Heat and connect the cords: Using a cigarette lighter, carefully heat the end of the broken cord until it melts slightly. Then, pinch the melted end of the old cord and the new cord together until they are connected. Apply more heat and pinch as needed to ensure a secure connection between the cords.
Step 3: Pull the cord through the blinds: With the cords connected, gently pull the cord through the blinds, ensuring it moves smoothly through the slats. As you pull, guide the cord through the blades until it reaches the top of the blinds. Be sure to guide it through the headrail until it comes out fully, pulling out the old cord in the process. Take your time to prevent any tangles or knots.
Step 4: Tie a knot and secure the new cord: Once the new cord is fully pulled through, separate it from the old cord. Cut the bottom section of the new cord and tie a single knot at the end. Pull the knot tightly into place to ensure it is secure and won't slip through the headrail.
Here are some precautions to take when replacing your Venetian blind cords:
- Take caution when using a cigarette lighter to heat the cord. Avoid excessive heat that could damage the surrounding components or cause injury.
- Use pliers to hold the cord and protect your fingers from the heat while connecting the old and new cords.
- Check that your new cord is of the appropriate size for your blinds.
- Before starting the repair, cleaning the blinds and removing any dirt or dust that may interfere with the cord replacement process is recommended.
Remember to work carefully and take your time to ensure a successful repair.
Sagging
Sagging blinds can be caused by soft cords or disconnected string ladders, or cloth tape. There is an easy way to fix sagging Venetian blinds, so let's walk you through how to do it, restoring their level appearance and functionality. Let's get started:
Step 1: Addressing soft cords and cord lock: Begin by identifying the soft cord that is causing the sagging. Take this cord and thread it to the other side of the bar where the cord lock is located so that both cords - the soft one and the other cord - are now on the same side. By doing this, you'll increase the pressure on the cord lock, allowing it to grab the cords more effectively and prevent the blinds from sagging. This step helps restore proper tension in the blinds.
Step 2: Reattaching the string ladder or cloth tape: If the slats on your blinds are hanging lopsided, it's likely that the string ladder or cloth tape has become disconnected from the drums inside the headrail of the blind. To fix this, locate the disconnected ladder or tape. It will typically be hanging loose and not connected to the drums.
Step 3: Attaching the ladder or tape to the drums: Take the loose end of the ladder or tape and reattach it to the corresponding drum inside the headrail. You may need to slide the ladder or tape through the slots on the drums and secure it in place. Ensure that it is properly aligned and attached to the drum to provide proper support to the slats.
When fixing sagging Venetian blind cords, consider these precautions:
- When threading the cords to the other side of the bar, be careful not to twist or tangle them. Ensure they are smoothly guided to the desired side for effective cord lock engagement.
- Take your time when reattaching the string ladder or cloth tape to the drums. Proper alignment and attachment will ensure the blinds hang evenly and operate smoothly.
That's all there is to it! You'll love seeing your blinds hang beautifully once again, with proper tension and a level appearance.

Maintenance Tips for Venetian Blinds
Your windows will not only be more attractive when you use Venetian blinds but also provide privacy and light control. To ensure they continue to look their best and operate smoothly, regular maintenance is key.
By following a few simple tips, you can extend the life of your Venetian blinds and prevent damage or wear. Let's delve into some practical maintenance advice:
- Regular Dusting: Dust accumulation is a common issue with blinds. To keep your Venetian blinds looking fresh, it's important to dust them regularly. Use a soft cloth, microfiber duster, or a vacuum cleaner with a brush attachment to gently remove dust from both sides of the slats. Start from the top and work your way down, ensuring all the slats are thoroughly cleaned.
- Deep Cleaning: In addition to regular dusting, periodic deep cleaning is necessary to remove stubborn dirt, stains, or grease buildup. Fill a basin or bathtub with warm water and a mild detergent. Take down the blinds and immerse them in the soapy water. Use a soft brush or sponge to gently scrub the slats, paying extra attention to any particularly dirty areas. Rinse the blinds with clean water and allow them to dry completely before reinstallation.
- Avoid Excessive Moisture: While it's important to clean your Venetian blinds, excessive moisture can be detrimental to their longevity. Avoid submerging them in water for extended periods, as this can cause warping or damage to the slats. When cleaning with a damp cloth or sponge, make sure it is only slightly moistened to prevent excessive moisture from seeping into the blinds.
- Gentle Handling: When operating your Venetian blinds, handle them with care. Avoid pulling the cords too forcefully or tugging on the slats, as this can lead to damage or misalignment. Use smooth and gentle movements when adjusting the slats or raising and lowering the blinds.
- Regular Cord Inspection: Check the condition of the cords periodically to ensure they are not frayed, worn, or tangled. If you notice any issues with the cords, address them promptly by repairing or replacing them. Damaged cords can affect the functionality of your blinds and may lead to further problems.
- Preventative Measures: Taking preventative measures can significantly prolong the life of your Venetian blinds. Avoid exposing them to excessive sunlight for prolonged periods, as this can fade or discolour the slats. If possible, use window coverings or curtains to protect the blinds from direct sunlight. Additionally, be cautious with sharp objects or abrasive cleaners near the blinds to prevent scratches or damage to the slats.
With a bit of effort and attention, your Venetian blinds will continue to enhance your space and provide you with privacy and light control for many years to come.
When to Seek Professional Help
When it comes to repairing Venetian blinds, there are instances where professional assistance is recommended.
Complex mechanism issues, such as problems with lifting or tilting mechanisms, often require the specialized knowledge and tools that professionals possess. Additionally, extensive damage or structural issues, like multiple broken slats or headrail problems, are best handled by experienced repair services.
When looking for a professional repair service, it's beneficial to seek recommendations from friends, family, or neighbours who have had positive experiences. Conduct research and read reviews of local blind repair companies to assess their reputation and customer satisfaction.
Make sure the repair service is qualified, licensed, and insured so they can offer repairs at a reasonable price. Responsiveness and the ability to address any questions or concerns you may have are also important factors to consider.
By recognizing when professional help is needed and following these guidelines, you can ensure the best outcome for your Venetian blind repairs.
Empowering Yourself: The Rewards of DIY Repair
Taking control of your home repairs and tackling DIY projects can be a rewarding experience, especially when it comes to fixing common issues with Venetian blinds.
By learning how to repair them, you can save time and money while maintaining the functionality and aesthetics of your window treatments.
At Factory Direct Blinds, we understand the significance of choosing high-quality blinds that suit your style and budget. Our commitment lies in offering a diverse range of window treatments that can transform your living space.
With our products, you can rest assured knowing that your blinds are covered by our warranty promise, ensuring they are free of defects. If you encounter any issues with your blinds, whether it's broken slats or malfunctioning motorization features, our team is here to assist you.
Take the next step in elevating your home decor today and experience a secure buying experience that guarantees quality and customer satisfaction at Factory Direct Blinds.
FAQs
Can Venetian blinds be repaired?
Yes, Venetian blinds can be repaired. Many common issues, such as broken or bent slats, jammed cords, or sagging blinds, can be fixed with some DIY techniques. In cases with complex mechanisms and extensive damage, professional help is required.
Is it worth it to repair blinds?
Yes, minor repairs can extend the lifespan of blinds without requiring costly repairs. That said, whether it's worth repairing blinds depends on the extent of the damage and the cost of repair compared to the cost of replacement. If the blinds are extensively damaged or outdated, it might be more practical to replace them.
How do you fix a broken string on Venetian blinds?
To fix a broken string on Venetian blinds, you can replace the cord yourself by obtaining a replacement cord and following some quick instructions. This typically involves cutting the old cord, connecting the new cord, and pulling it through the blinds, ensuring it is properly threaded and secured. In most cases, parts do not need to be replaced.
Is there a way to fix a broken blind slat?
Yes, there are methods to fix a broken blind slat. For minor damage, you can try straightening bent slats using your hands or applying gentle pressure.
If a slat is broken beyond repair, it can be replaced by removing the damaged slat and inserting a new one, either purchased as a replacement or from a spare slat taken from the bottom of the blinds.