Skip to content

6 Reasons to Install Your Own Shades and Blinds


Intimidated by the thought of installing your own custom shades or blinds? Banish the notion that you can’t do it. We know you have it in you. Why are we so certain? Because after 25 years in business, all of us at Factory Direct Blinds have coached thousands of customers just like you through the process. If they can hang their own window coverings, so can you.
Keep reading to learn everything you need to know to get it right the first time—starting with a half-dozen reasons it really is worth the effort.
6 REASONS TO INSTALL YOUR OWN WINDOW COVERINGS
No matter how many (or how few) home improvement projects you’ve tackled so far, this is one even an absolute beginner can master. Trust us, if you can put together a simple bookshelf, you can handle this DIY blind installation. It’s just that easy!
Key Takeaways
- Installing shades or blinds is achievable for beginners, comparable in difficulty to assembling a simple bookshelf.
- DIY installation saves significant money, especially when labor would be a large portion of the total cost.
- Doing installation personally provides deeper product knowledge and independence for repairs or moving.
- Some window treatments add complexity: wider shades, vertical vanes, outside mounts, and motorized systems.
 Save money
By far the best reason to learn how to install window shades is the cost savings. If you’re working within a budget, why invest in a service you can easily do yourself? This is especially true if money is tight. If you’re purchasing less expensive blinds or shades, a significant portion of your home improvement budget will be spent on labor. When you DIY, you can put that money into other areas of your house or back into your bank account.
 Do it on your own schedule
Whether you’re married with children, partnered up with pets, caring for a parent or 100 percent single, you have a busy schedule. You don’t want to burn a personal day on a blind installation—and you shouldn’t, not with something this simple. Installing window shades should take a few hours. Pick an afternoon—or an evening or morning—that suits your schedule and forget about the “sometime between noon and 5 p.m.” waiting game.

 Learn more about your blinds or shades
If you hire an installer right off the bat, you’ll likely feel like you need to call in a pro every time you have a problem with your window coverings. When you’re the one wielding the screwdriver, though, you’ll be the expert. Plus, you’ll have a direct line to your manufacturer or retailer. That means you can ask all those niggling little questions you have about the best way to measure your windows for your style of choice. This is especially true for renters, who can not only save money by installing their own blinds but also gain the ability to take the blinds with them once their lease is up since they know exactly how they were installed.
 Get it done exactly the way you want
Sometimes the best job is the one you do yourself. When you bring in an expert to tackle a home improvement project, it’s easy to feel out of your depth when you point out a problem. Many customers who use an installation service tell us that they were uncomfortable asking installers to redo things that weren’t perfect. Sometimes, installers don’t pay any mind to codes and regulations, leaving behind unsafe blinds. This can be troublesome for homeowners when they get their home appraised or go to resell it. In the end, the homeowners regretted their choice and wished they’d done it themselves.
 Gain confidence with DIY home improvement projects
Window shade installation feels like a huge project because it makes such a big difference in your home. In reality, though, it’s an install that takes just a few hours, which is probably less time than it will take you to paint a room. It’s minimal work for maximum result. Once you step back and realize you’ve completed your task, you’ll feel like you can conquer the world. Or, at the very least, the next project on your to-do list.
 Bragging rights
Did we mention that every time you have guests over, you can casually point out your custom blinds or shades and say, “Don’t they look good? I installed them myself, of course.” Feel free to brush off your shoulders and pat yourself on the back. You deserve it!
EVERYTHING YOU NEED TO INSTALL YOUR OWN BLINDS OR SHADES
One of the things that makes this project so doable for the average homeowner is that it doesn’t require any special equipment. In fact, even if you don’t own everything listed here, it should be easy to borrow these items from a family member, friend or neighbor.
If you do need to make a run to the hardware store, know that these won’t be one-time use purchases. You’ll use them over and over again for other home improvement and craft projects. With that in mind, invest in quality tools that will stand the test of time. Look online for reviews as you search for the ideal power tools and other equipment for your situation.
Ready to get to work? Whether you’re getting ready to install blinds, shades or curtains, here is the equipment that you need for a basic DIY blind installation:
- Stepstool or ladder
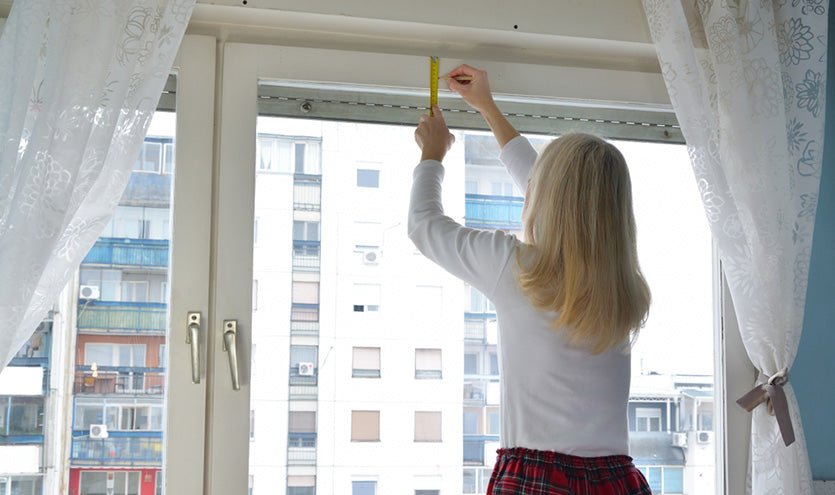
- Tape measure
- Pencil
- Drill and drill bit
- Level
- Screwdriver
- Hardware, which should come with your blinds or shades. You might need wall anchors if you find yourself drilling into dry wall rather than studs or a wooden window frame.
HOW TO FIND BLINDS AND SHADES YOU CAN EASILY INSTALL YOURSELF

The general rule for ease in DIY blind installation is this: The more pieces a window treatment has, the more complex it will be to install. That doesn’t mean it’s impossible, even for a beginner. It just might take more time or effort to get it all done.
Which types of blinds and shades will take longer for you to install? Here’s our shortlist:
Wider shades
A shade that fits a wider window will be bulkier and more cumbersome to handle, especially if you’re working by yourself. Depending on how large your windows are, you’ll also be working with more than two brackets. If you have windows of different widths, work on the narrow windows first so that you can figure out exactly what you’re doing without struggling with a larger window covering.
INSTALLATION TIP: While the middle bracket is mounted in the center of our window covering, you actually should attach it slightly off-center so that it doesn’t interfere with the movement mechanisms of the blind or shade. Whether you shift it a bit to the right or a bit to the left doesn’t matter. Just make sure the bracket doesn’t interfere with any cords or cables.

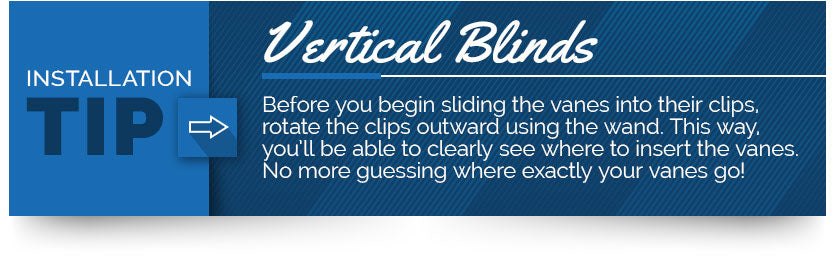
Vertical blinds
While vertical blinds are installed using the same basic installation method, they do come with the additional task of attaching each individual vertical blind, or vane, to a clip. It’s an easy task, but an extra one.
INSTALLATION TIP: Before you begin sliding the vanes into their clips, rotate the clips outward using the wand. This way, you’ll be able to clearly see where to insert the vanes. No more fiddling around guessing about where exactly your vanes go!
Outside mount window coverings
There are two ways you can install a window treatment like blinds or shades: an outside mount or an inside mount. An outside mount sits directly on the window frame or outside of it. An inside mount sits inside the window frame and doesn’t obscure any of the moldings surrounding the window itself. An outside mount is slightly more complicated because you’ll need to install the valance, which covers the exposed top of the window treatment.
INSTALLATION TIP: The valance attaches to your blinds or shades using two (or more) plastic clips. Slip these on to your window treatments before you mount them onto the brackets. That’ll make installing the valance a literal snap.

Motorized blinds and shades
These are more difficult to install because they require a power source. Motorized window coverings are powered by a few different methods. Some use batteries, some are hard-wired into your home’s electrical grid (which will require you to hire an electrician), some are solar-powered and some plug directly into an outlet the same way a lamp does.
Battery-powered motorized window treatments are the simplest for homeowners to install themselves, although you’ll still find yourself needing to connect wires to a motor built into the blind or shade’s mechanism. However, as with all battery-powered items, you’ll need to replace those batteries periodically. Batteries can also make this option more expensive in the long-term, although the convenience might be worth it for you.
INSTALLATION TIP: If you’re considering installing motorized window coverings that require an outlet for power, be sure to measure the distance from the nearest electrical outlet to the top of your window when you measure the size of your window.

If you’re not sure whether the window treatments you want to put up in your home are DIY-friendly for a home improvement beginner, don’t hesitate to call the company you’re ordering your blinds or shades from. Their customer service department should be able to answer any questions you have—or connect you with an in-house installation expert who can.
There you have it! Everything you need to know about installing your own blinds or shades and you learned right here.
As you work through your window treatment installation, remember to take it one step at a time. Measure twice, drill once. And if you mess up? Well, it happens to the best of us! Any mistake you make can be fixed. But honestly? We’re pretty sure you have this home improvement project in the bag.
Frequently Asked Questions
What basic tools do I need to install blinds or shades myself?
You need a stepstool or ladder, tape measure, pencil, drill and drill bit, level, screwdriver, and the hardware that comes with your blinds or shades; you may also need wall anchors if mounting into drywall. For step‑by‑step setup tips, see the installation guide.
Which types of blinds or shades are typically harder for beginners to install?
Wider shades can be bulky and may require extra brackets, vertical blinds need each vane attached to a clip, outside mounts require installing the valance, and motorized units are more complex because they need a power source or wiring. Each of these adds extra time or steps compared with a simple inside‑mount, single‑piece shade.
How long should I expect a DIY blind or shade installation to take?
A basic installation should take a few hours, though actual time depends on the size and complexity of the window treatment. Larger windows, multi‑bracket setups, or motorized systems will add time compared with a single, small inside‑mount shade.
How should I account for power and measurements when ordering motorized blinds?
When ordering motorized blinds that require an outlet, measure the distance from the nearest electrical outlet to the top of your window so you can plan for power access. Battery‑powered motorized options are the simplest to install for most homeowners, but they still require connecting the motor and will need periodic battery replacement.