Skip to content

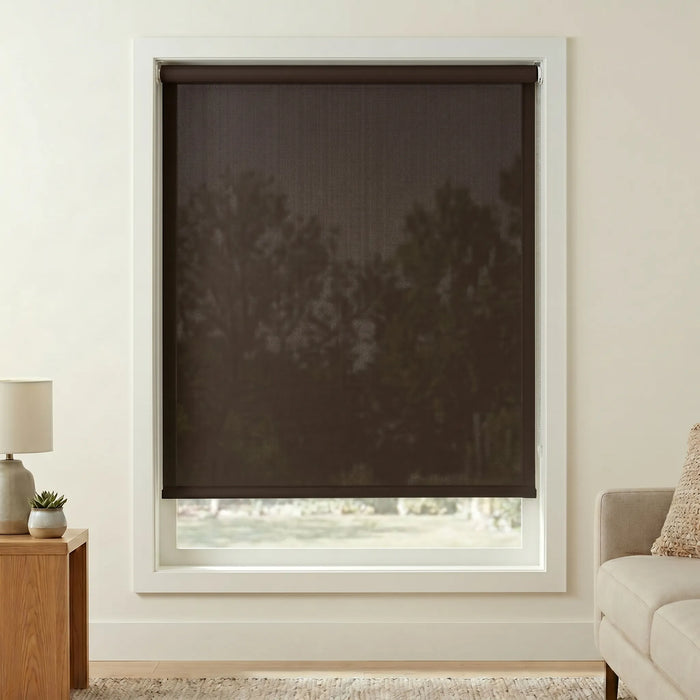
Master the Basics: How to Install Roller Blinds Guide


In a world with constant scrutiny from the public eye, privacy is a cornerstone of our daily lives. Our homes should always be a sanctuary, a refuge from prying eyes, where we can share intimate moments and unwind after a long day.
Key Takeaways
- Roller blinds combine a sleek, modern look with practical light control and privacy for many rooms.
- Inside mount offers an integrated, trim-friendly fit while outside mount provides greater coverage and flexibility.
- Cordless roller blinds eliminate cords for child safety and operate by pulling or pushing the bottom bar.
- Accurate measuring, level bracket installation, testing movement and simple cleaning ensure reliable function and longevity.
That's where window blinds step in as unsung heroes of home decoration, serving a dual purpose beyond aesthetics. With that, roller blinds remain the popular choice. These unassuming window coverings have quietly become a go-to choice for homeowners seeking a seamless blend of style and functionality.
With their sleek appearance and unobtrusive design, roller blinds have redefined the way we think about window treatments while also ensuring that our precious moments behind closed doors remain truly private.
In this guide, we'll walk you through a straightforward, step-by-step tutorial on how to install roller blinds in your home. Once you know the steps, roller blinds are easy to install in less than 30 minutes.
So, let's roll up our sleeves and get started on this journey to enhanced privacy and an elevated living space.
IN THIS ARTICLE
BROWSE OUR FULL RANGE OF ROLLER BLINDS
Why Choose Roller Blinds?
When it comes to window treatments, hanging roller shades and blinds stand as shining examples of simplicity meeting sophistication. These unassuming home essentials have garnered a loyal following for several compelling reasons, making them a smart choice for those seeking a harmonious blend of aesthetics and practicality.
Aesthetic Appeal: Elevate Your Space
We all want our homes to look good. Roller blinds effortlessly enhance the aesthetics of any room with their clean lines and contemporary design. Their sleek appearance adds a touch of modernity to your living space, and the wide range of colours and patterns available ensures you'll find the perfect fit for your interior decor.
Faux wood blinds can even be installed in bathrooms, kitchens, washrooms, and laundry rooms to give these rooms a more natural look.
Whether you prefer a minimalist ambiance or a bold statement, roller blinds can be customized to match your unique style in every room in the home.
Ease of Use: A Simple Solution
Roller blinds are a breeze to operate. With a smooth, straightforward mechanism, you can effortlessly adjust your room's light and privacy level. Whether you choose modern white and gray blinds for the living room or kitchen and even blackout roller blinds for the bedroom windows, they are perfect practically anywhere in the home.
No more struggling with tangled cords or complicated systems. Just a quick pull or push, and you're in control.
Minimal Maintenance: More Living, Less Cleaning
Unlike some window treatments that require regular dusting, washing, or intricate upkeep, roller blinds are refreshingly low-maintenance.
A simple wipe-down with a damp cloth is usually all it takes to keep them looking their best. In particular, solar shades for windows are made from humidity- and moisture-resistant materials, so they will not absorb water. Say goodbye to hours spent on tedious cleaning routines and hello to more free time for what matters most.
Versatility: Fit for Every Window
One of the standout features of roller blinds is their versatility. They're suitable for a wide range of window sizes and shapes, from standard rectangular windows to sliding glass doors and even skylights.
This adaptability ensures you can maintain a cohesive look throughout your home without the hassle of hunting for different window treatments for each room.
Affordability: Style on a Budget
Roller blinds are a budget-friendly choice compared to some other window treatment options. You don't have to break the bank to achieve a polished and put-together look in your home. Roller blinds offer a cost-effective way to elevate your space without compromising quality.

Pre-Installation Steps
Before diving into the installation process of your roller blinds, it's essential to lay a solid foundation. These pre-installation steps might seem like minor details, but they play a crucial role in ensuring a smooth and hassle-free setup. Let's break down the significance of each step:
Choose Your Mounting Style
Your choice of mounting style sets the stage for how your roller blinds will appear and function. Inside mount, as the name suggests, positions the blinds inside the window frame, creating a sleek and integrated look.
Outside mount, on the other hand, places the blinds outside the frame, offering more coverage and flexibility.
Advantages and Considerations:
- Inside Mount: Provides a clean and uncluttered appearance. Ideal for showcasing decorative window trim or moulding. Considerations include ensuring sufficient depth within the window frame and accommodating obstructions like handles or cranks.
- Outside Mount: Offers better light blockage and privacy. Conceals uneven or unattractive window frames. Considerations involve measuring the space accurately to avoid gaps and ensuring adequate clearance for the blinds to operate smoothly.
Measure Your Window
Accurate measurements are the cornerstone of a successful roller blind installation. Here's a step-by-step guide to ensure precision:
- Begin by placing pencil marks on the top, middle, and bottom of the window frame.
- Measure from one mark to the other horizontally for width, ensuring you record the narrowest measurement.
- For height, measure from the top mark to the windowsill or the desired endpoint, again taking the shortest measurement.
Neglecting either width or height can lead to ill-fitting blinds that don't provide the desired coverage or functionality. Always measure both dimensions to ensure your roller blinds fit perfectly.
Acquire Necessary Tools
Having the right tools on hand simplifies the installation process and minimizes potential frustrations. Here's a list of essential tools:
- Drill
- Drill bits
- Tape measure
- Pencil
- Level
- Screws
- Screwdriver
- Pliers
- Step ladder or stool (if needed)
- Manufacturer's instructions (for reference)
While alternative methods may exist for some tools, such as substituting a drill with a manual screwdriver, having the recommended tools ensures a smoother and more efficient installation.
Inside Mount Roller Blind Installation
Now that you've prepped your space and gathered the necessary tools, it's time to dive into the installation process, specifically for inside mount roller blinds. This method creates a polished, integrated look perfect for showcasing your window trim or adding a touch of modern elegance to your space.
Follow these straightforward steps for successful installation:
1. Place Brackets Inside the Window Frame
Positioning the right and left brackets inside the window frame is the key to achieving that clean, tucked-away appearance. Here's how to fit blinds:
- Take the blind bracket and hold it against the top inside corner of the frame, ensuring it's flush with the frame's edge.
- Use your pencil to mark the bracket's mounting holes in the frame. Repeat this process on the opposite side.
2. Mark Bracket Placement Within the Recess
Now, let's make sure those brackets are perfectly aligned within the window frame:
- Using your level, draw a straight line across the top of the window frame, connecting the two marks you made for the bracket holes. This line serves as a guide to ensure your brackets are level.
- Measure and mark a spot along the line at each bracket's center. This is where you'll install the brackets.
3. Affix Brackets Inside the Window Frame
With your bracket placement clearly marked, it's time to secure them in place:
- Drill pilot screw holes into the spots you marked for the bracket centers.
- Align the brackets with the pilot holes, making sure they're level with the line you drew.
- Secure the brackets in place using the screws provided. Be sure they're snug but not overly tight to avoid damaging the frame.
4. Ensure Brackets are Level for Smooth Blind Operation
A crucial step for your roller blinds to operate smoothly is checking that the brackets are level. Use your level to verify that both brackets are perfectly horizontal. Adjust if necessary to maintain a level playing field.
5. Place Your Inside Mount Roller Blind
With the brackets securely in place, you’ll need to learn how to hang roller shades:
- Insert the roller blind into the brackets, making sure the pin on the blind fits snugly into the bracket's slot.
- Carefully lower the blind until it clicks securely into the brackets. Be gentle to avoid damage.
6. Maintain Smooth Rolling
To ensure your roller blind operates seamlessly without touching the window frame:
- Test the blind by pulling it down and rolling it up a few times. Be sure it moves freely without any obstructions.
- Make any necessary adjustments to the bracket positions or the blind itself to achieve a smooth operation.
And there you have it – your inside mount roller blind fixings are now expertly installed, providing a sleek, unobtrusive window treatment that effortlessly enhances your living space.
With the right placement and a keen eye for detail, you've achieved style and functionality in one simple installation.
Outside Mount Roller Blind Installation Guide
When you opt for an outside mount installation, you're embracing versatility and ensuring maximum coverage for your roller blinds. This method allows you to conceal uneven or less-than-ideal window frames while making a bold statement.
Here's your step-by-step guide to installing roller blinds on the outside mount:
1. Place Brackets on the Wall or Window Moulding
For outside mount roller blinds, the brackets will be affixed to either the wall or the window moulding surrounding your window. Follow these steps to ensure proper placement:
- Hold one bracket against the chosen surface, ensuring it's level and positioned where you want your roller blind to hang.
- Use your pencil to mark the bracket's mounting holes in the wall or moulding. Repeat this process on the opposite side.
2. Mark Accurate Bracket Placement Outside the Window Recess
As with inside mount installation, you must ensure the brackets are perfectly aligned. This time, outside the window frame.
Using your level, draw a straight horizontal line where you want the roller blinds to hang, aligning with the upper edge of the window frame. At each bracket's center, mark a spot on the line where you will install the brackets.
3. Fix Brackets Outside the Window Frame
With your bracket placement clearly marked, it's time to secure them in place. Make pilot holes in the wall or moulding where you marked the screw locations and align the brackets with the pilot holes, making sure they're level with the horizontal line you drew. Use the screws provided to secure the brackets and ensure they're not overly tight.
4. Check Level Brackets for Optimal Blind Functionality
Just like with inside mount installation, it's crucial to ensure that your brackets are perfectly level for the best roller blind performance. Use your level to double-check and make any necessary adjustments.
5. Set the Roller Blind on an Outside Mount Setup
Now that your brackets are securely in place, it's time to hang your roller blind:
- Insert the roller blind into the brackets, ensuring that the pin on the blind fits snugly into the bracket's slot.
- Carefully lower the blind until it clicks securely into the brackets. Handle with care to avoid any damage.
6. Troubleshooting Tips for Proper Positioning
If your roller blind seems too close or too far from the window, here are some troubleshooting tips:
- If it's too close: You can adjust the brackets outward slightly to create more space between the blind and the window frame.
- If it's too far: You may need to reposition the brackets slightly closer together to achieve the desired placement.
With your outside mount roller blind expertly installed, your living room is transformed into a stylish and functional space in no time at all.

Cordless Roller Blind Installation Guide
With safety and aesthetics seamlessly intertwined, cordless roller blinds have emerged as a smart choice for homeowners. These window treatments not only enhance the look of your space but also eliminate the potential hazards posed by corded blinds.
Cordless roller blinds offer a blend of style and safety that's hard to match. Their sleek and uncluttered appearance complements any room's decor, while the absence of cords eliminates the risk of entanglement and enhances child safety.
With cordless blinds, you can enjoy peace of mind and elegant design quickly and easily. For proper installation, follow these steps.
- Marking for Cordless Brackets: Start by holding one bracket against the surface where you want your cordless roller blind to hang. Keep in mind that cordless brackets might have a slightly different design. Mark the bracket's mounting holes using a pencil. Repeat this process for the opposite bracket.
- Installing Cordless Brackets: Install the brackets using the provided screws. Make sure they're level and secure. Pay close attention to any specific design or installation instructions that come with your cordless brackets.
- Inserting the Cordless Roller: Slide the cordless roller into the brackets, ensuring that it fits snugly and securely. The absence of cords makes this step even simpler and safer.
- Ensuring Smooth Movement: To ensure smooth, frictionless movement of your cordless roller blind, gently pull down and push up on the bottom bar a few times. This way, your blinds operate effortlessly when you need to adjust the blind.
- Operating Cordless Blinds Safely: To raise or lower the blind, simply grasp the bottom bar and pull it down to your desired position. To lock it in place, gently tug the bar once more. To release the lock and raise the blind, push the bottom bar slightly upward.
- Keeping the Blind in Position: Cordless roller blinds are designed to stay in the desired position without a cord. Simply pull them down or push them up to the height you want, and they'll remain steady until you decide to adjust them.
Enjoy the elegant simplicity and child-safe design of cordless blinds in every pull, knowing you've made a smart choice for your home.
Final Step: How to Test and Maintain Your Roller Shades
Congratulations on successfully installing your roller shades! Before you enjoy their newfound privacy and style in your space, ensure they function properly. Proper testing and maintenance are the keys to a long-lasting, hassle-free roller shade experience.
Testing Your Roller Shades
Begin by testing the upward and downward movement of your roller shades. Gently pull the shade down to its full length and then push it back up. This should be a smooth, effortless process. If you encounter any resistance or the shade doesn't move smoothly, there may be an issue with the installation or the shade itself.
Next, make sure your roller shades stay in the desired position. Pull them down to the height you want, and they should remain steady without slowly creeping back up. If your shades don't stay in place, you may need to adjust the tension or check for any obstructions.
Maintenance for Prolonged Life
Roller shades are low-maintenance by nature, but a little care goes a long way in preserving their functionality and appearance.
Regular dusting with a soft, dry cloth or a feather duster can keep your roller shades looking fresh. For deeper cleaning, use a slightly damp cloth, but avoid excessive moisture to prevent damage to the fabric.
Periodically, check for any signs of wear and tear, especially on the chain or other moving parts. If you notice any loose components or damage, address it promptly to avoid further issues.
By following these simple steps, you can help your roller shades remain in excellent condition, providing the style, privacy, and functionality you desire for years to come.
GRAB OUR BESTSELLING BLINDS HERE
Take the Leap: Elevate Your Windows Now!
In the process of making your home a haven of style and privacy, we hope this step-by-step guide on how to install a roller shade has proven to be a valuable companion.
Roller blinds, with their seamless blend of elegance and functionality, offer a simple yet effective solution for enhancing any room.
At Factory Direct Blinds, we understand that the world of window treatments is as diverse as the people who call those spaces home. That's why we're proud to offer an array of window dressings to satisfy every need.
Whether you opt for roller blinds or explore our extensive range of materials and styles, you'll find options designed to create an oasis in your home.
Our commitment to quality and customer satisfaction ensures that your window treatment journey is a seamless one. So, as you bask in the privacy, style, and comfort of your newly installed roller blinds, remember that Factory Direct Blinds is here to meet all your window dressing needs.
FAQs
How easy is it to install roller blinds?
Installing roller blinds is generally considered easy and can be done by most DIY enthusiasts. The difficulty level may vary based on your experience and the specific type of installation (inside or outside mount).
What is the correct way to put up a roller blind?
Putting up a roller blind involves measuring accurately, securing brackets in place, and properly attaching the blind to the brackets. The specific steps can vary depending on whether it's an inside or outside mount.
Can you install your own roller blinds?
Yes, you can install your own roller blinds. Many come with installation instructions, and if you follow them carefully and have the necessary tools, you can self-install roller blinds as a manageable DIY project.
Do roller blinds go inside or outside the window?
Roller blinds can be installed either inside or outside the window frame, depending on your preference and the aesthetic you want to achieve. Inside mount provides a sleek, integrated look, while outside mount offers more coverage and flexibility.